Click on one of the following links for more info:
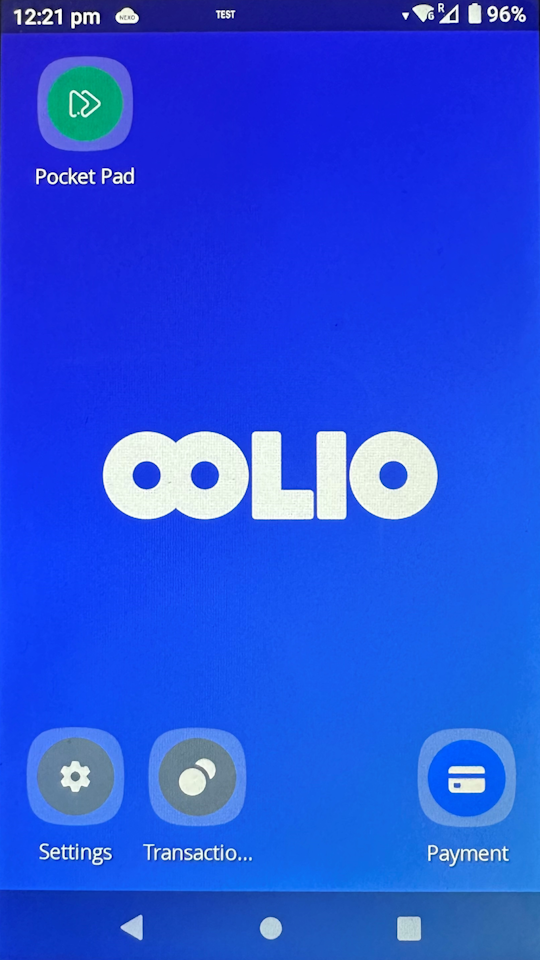
To begin placing an order with a mobile device (e.g. Oolio Pay device), open the Pocket Pad app.
The Pocket Pad app will appear on the top-left corner of the Oolio Pay device Home Screen.
Each time the Pocket Pad app is started, it will Download Program Data from your Idealpos System.
This data includes Table Layouts, POS Screen button layouts, Stock Items, Prices, etc.
Once Program Data has been downloaded, you will be presented with one of the following three screens, depending on how the app has been configured.
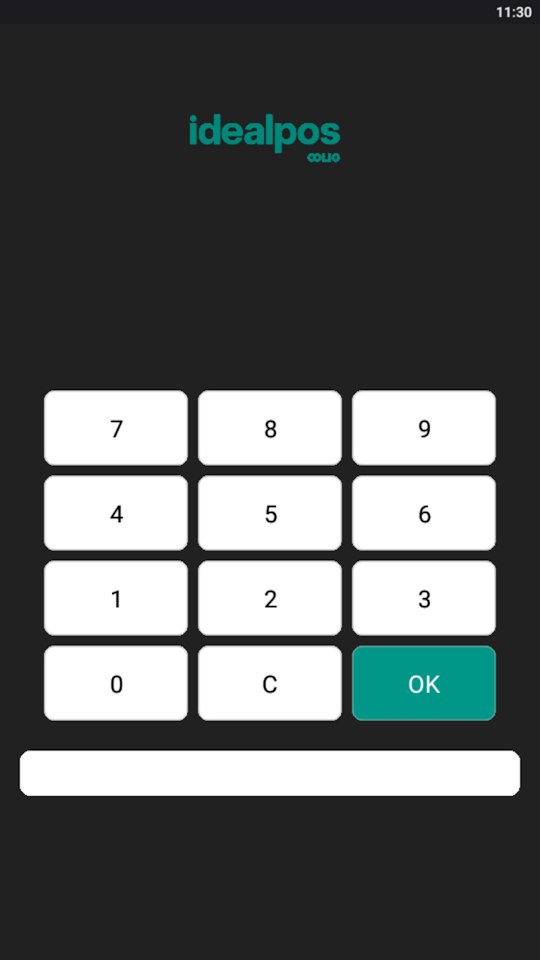
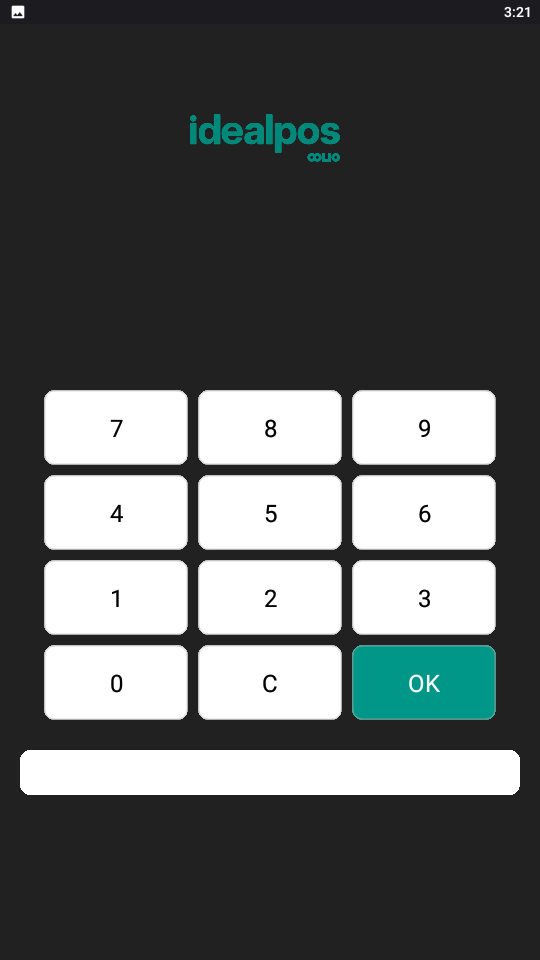
If Show Home Screen is enabled, you will need to enter either the Clerk Code or Login Code, then press OK to Login.
If Show Home Screen is disabled and the Compulsory Clerk option is enabled in the app Settings, a Clerk will need to be selected before an order can be placed to a table.
If Compulsory Clerk is not enabled, the first available Clerk will be selected by default and the Clerk list will not appear automatically.
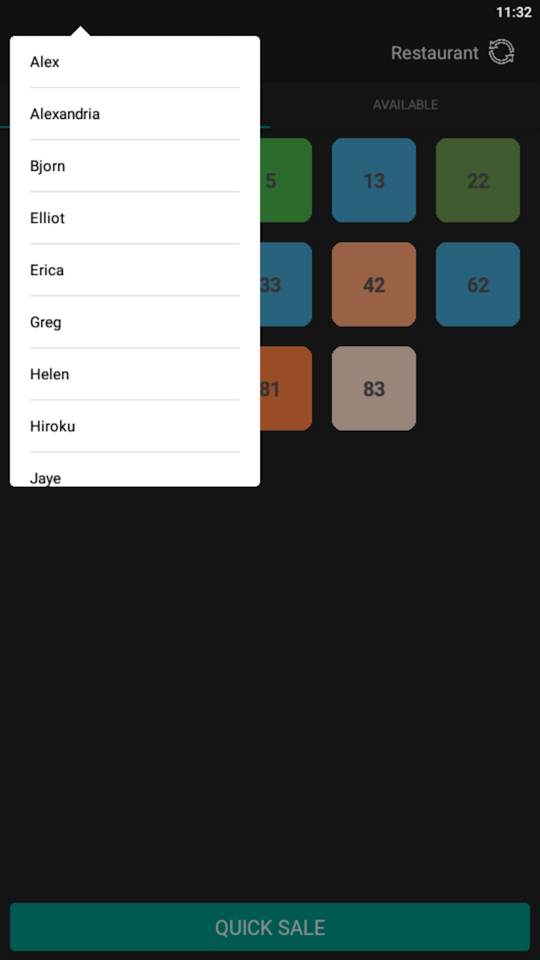
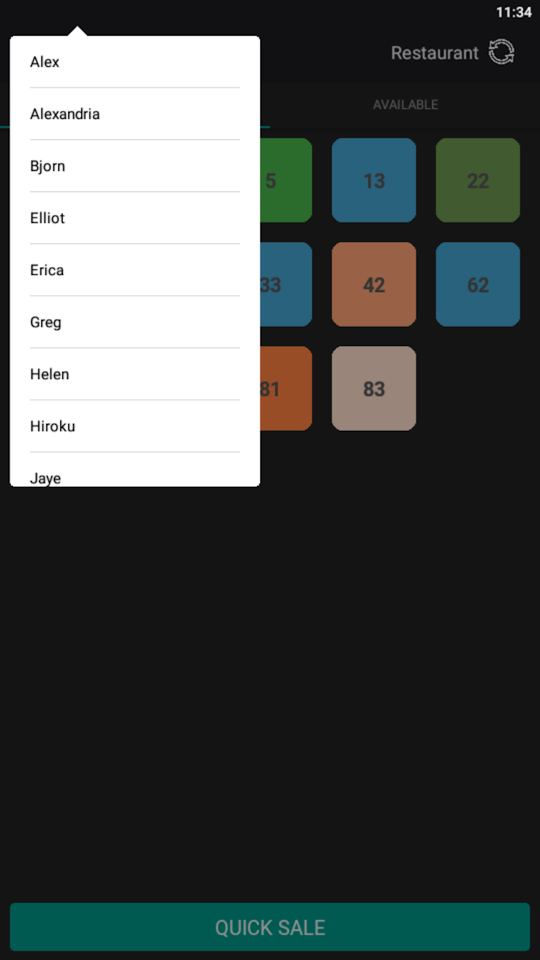
You can however click on the Clerk name at the top-left corner of the screen to display the list of Clerks and select another Clerk.
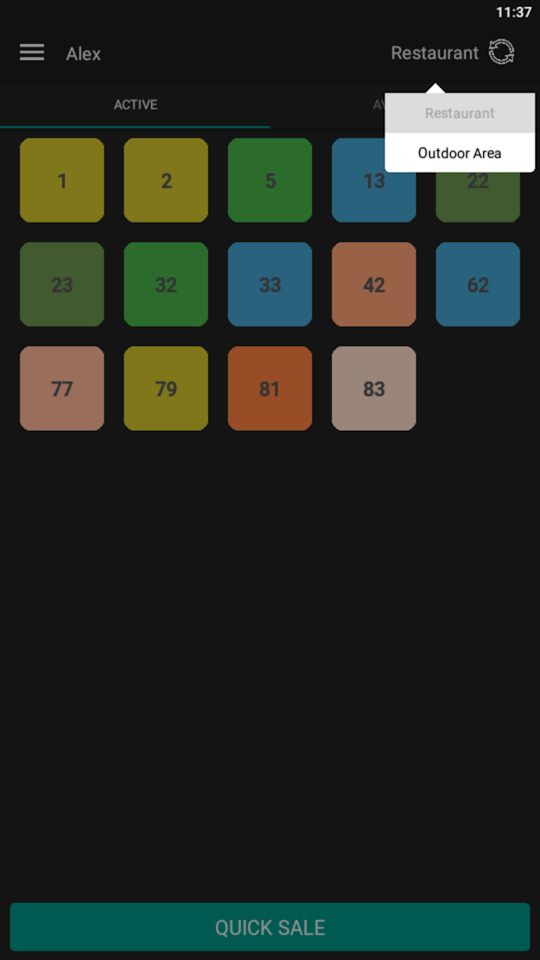
Once a Clerk has been selected, you can select the required Table Map from the Table Map dropdown listed located at the top-right corner of the screen (if you have more than one Table Map configured).
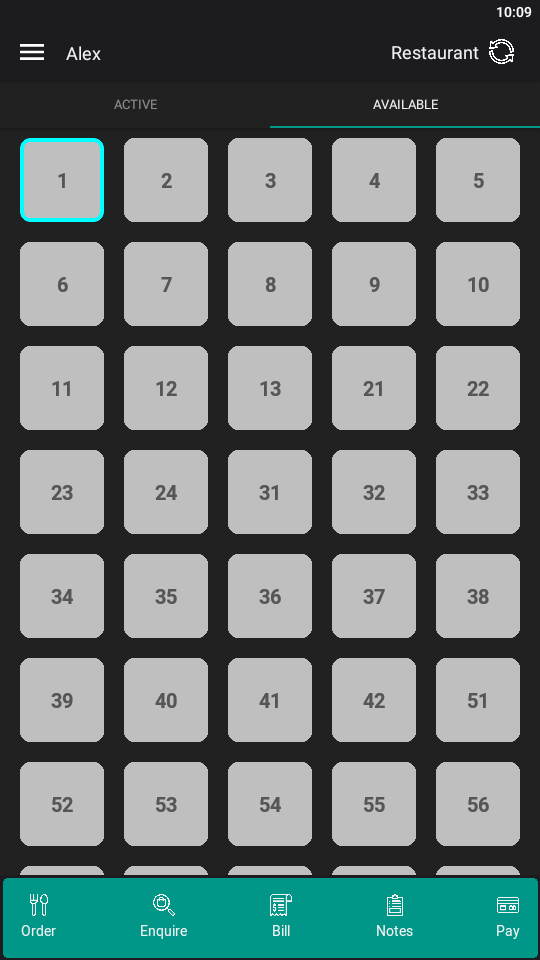
Select a Table Number from the Table Grid and press "Order".
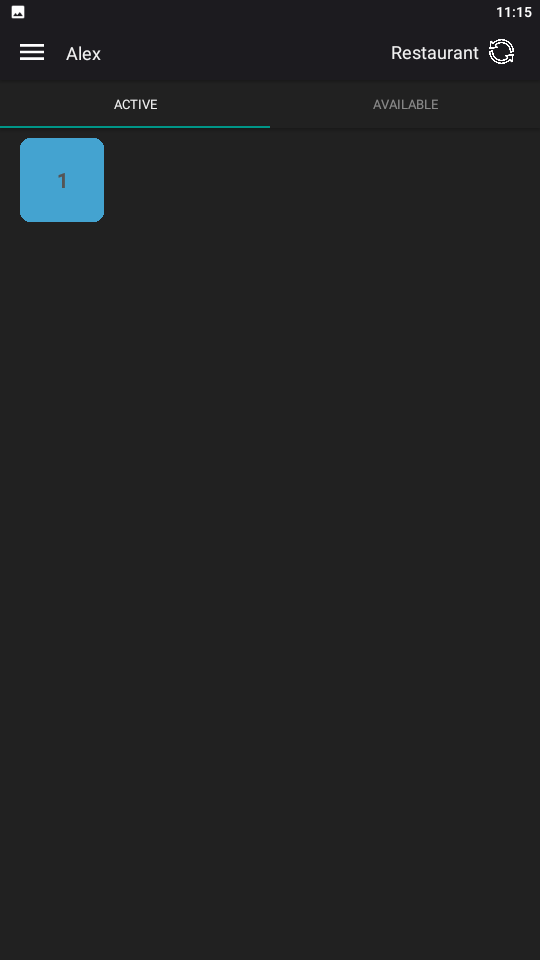
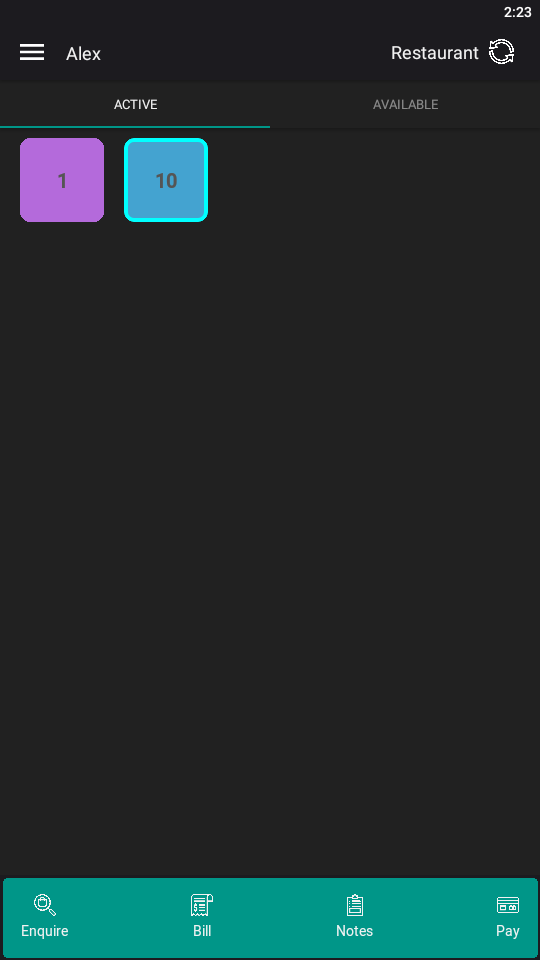
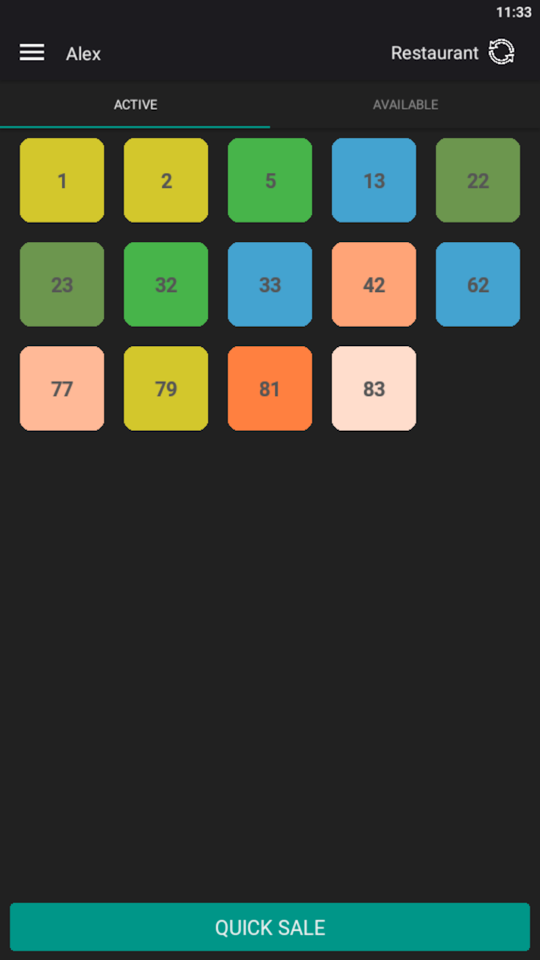
All tables that are Active will appear in the Active tab.
Any Available tables will appear in the Available tab.
Active tables include any table that is not "Ready" (e.g. this tab includes Tables that have a status of Seated, Ordered, Served, Bill Printed, To Clean, Reserved or Inactive - note that items cannot be saved to an Inactive table).
Available tables include any table that has a table status of "Ready". These are tables that are ready and available for customers to be seated at.
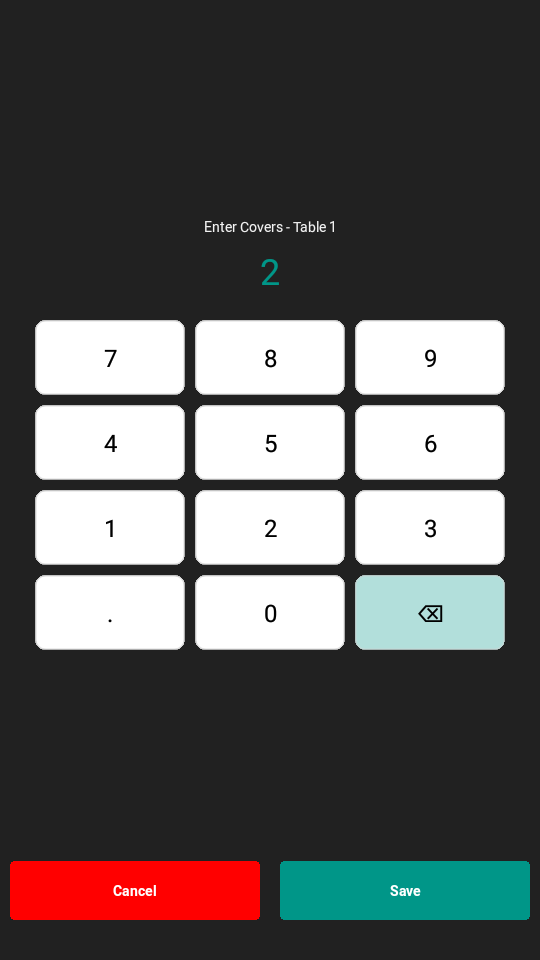
The next step involves entering the number of Guests/Covers and can vary depending on your system configuration.
If Prompt for Covers has been enabled in the Idealpos Yes/No Options, the app will display a prompt to enter the number of Guests after pressing the "Order" button.
If Prompt for Covers is not enabled in the Idealpos Yes/No Options, the Covers prompt will not be displayed and the Table will use the Default Guests/Covers.
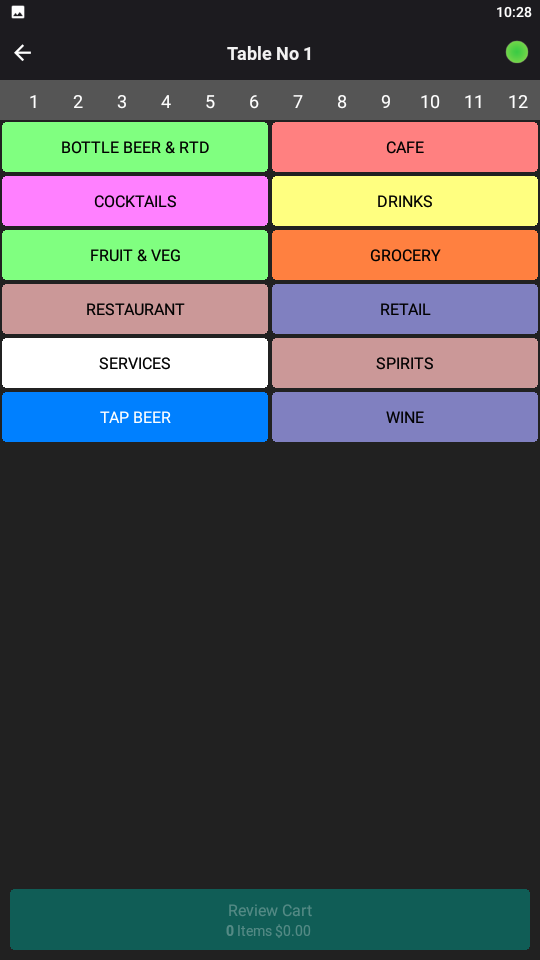
The Order screen will be displayed which is used to add items to the order.
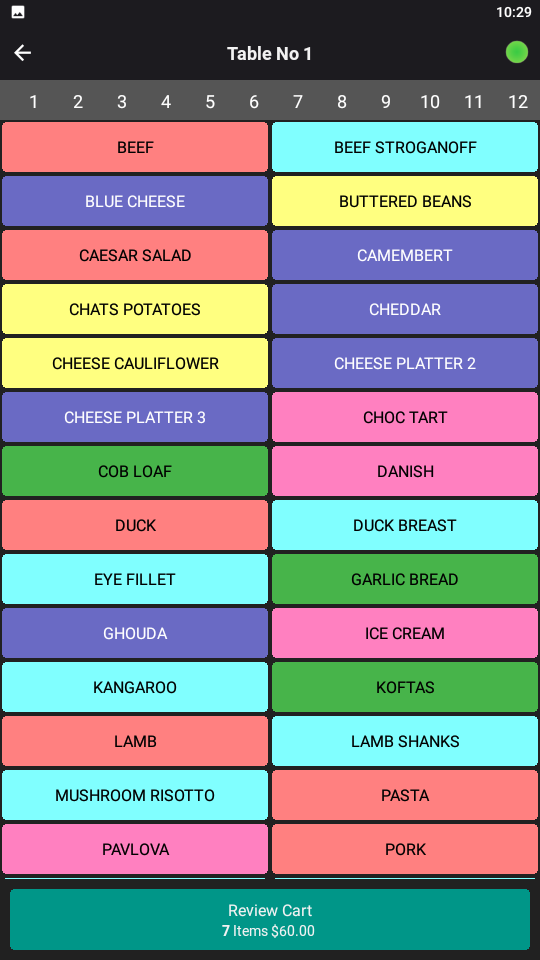
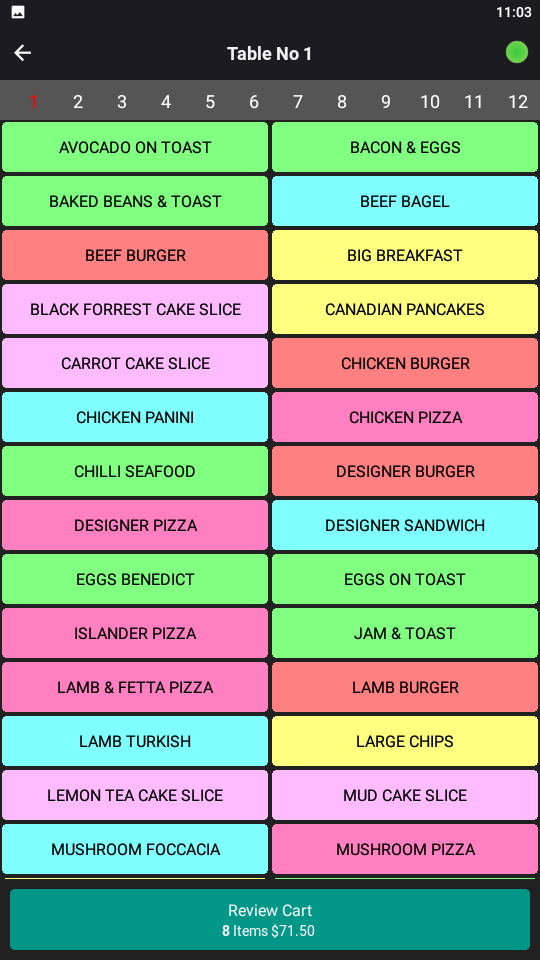
Navigate through the required menus and select the Stock Items to add to the table.
As Stock Items are added to the order, the button at the bottom of the screen will show the number of items ordered and the dollar value.
Note that at this stage in the order, the amount shown on the button does not include promotions (Promotions are calculated when Paying the table).
Also note that at this stage, the items are being saved to the cart on the device and have not yet been sent to the Kitchen.
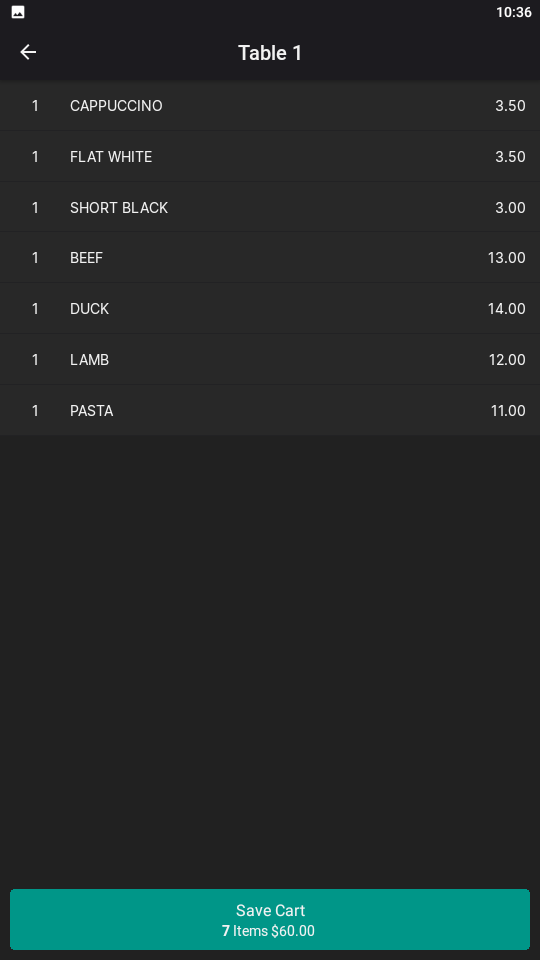
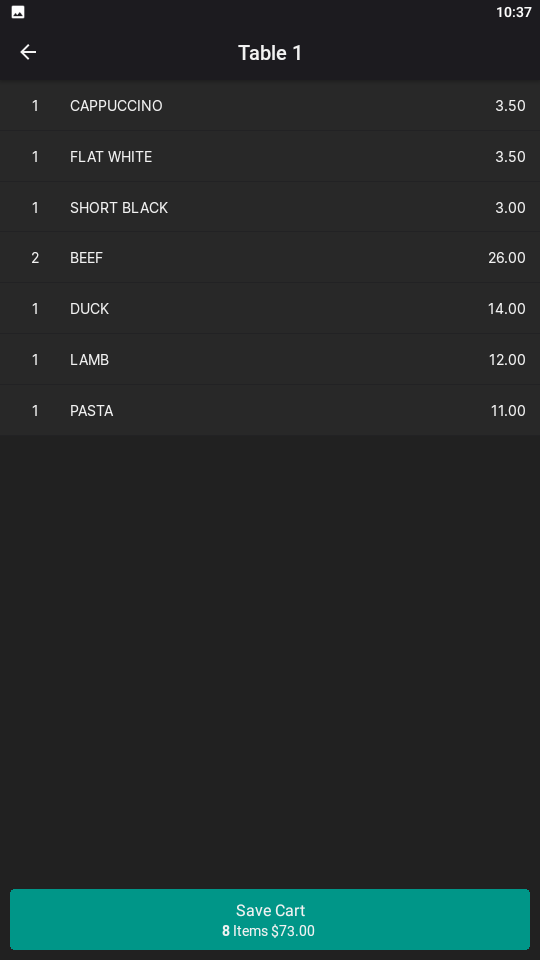
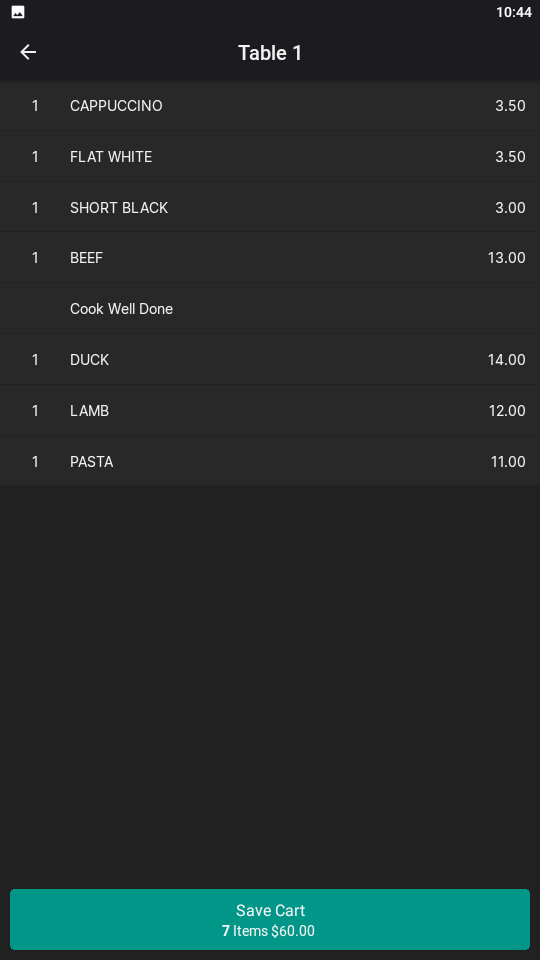
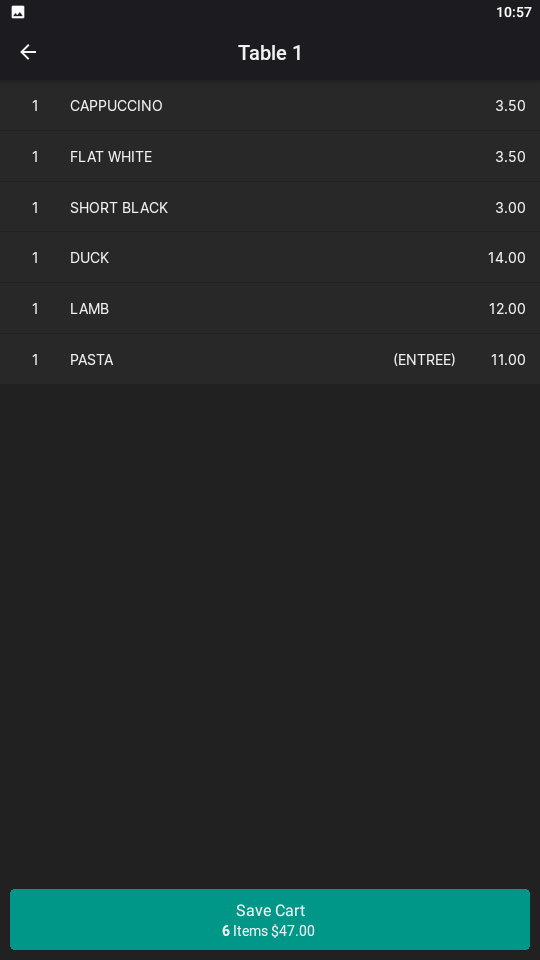
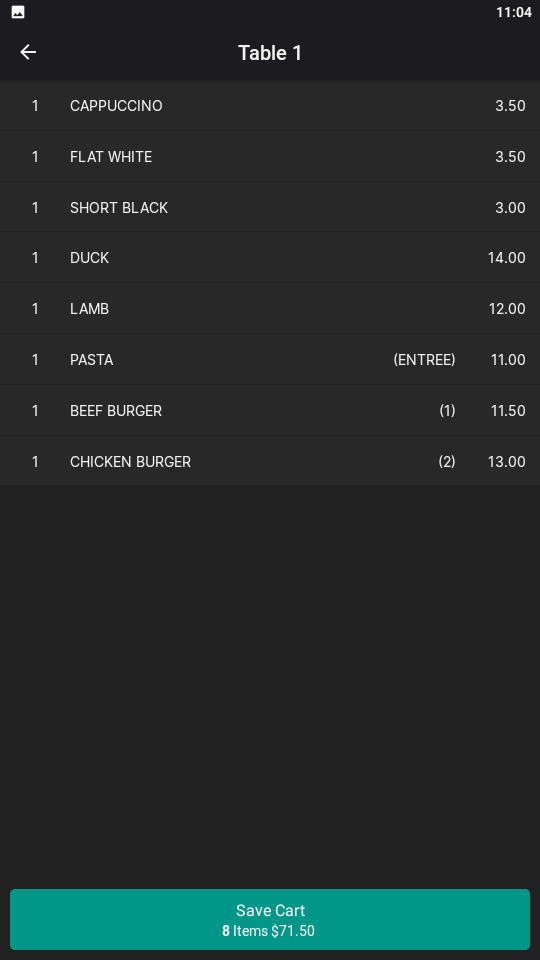
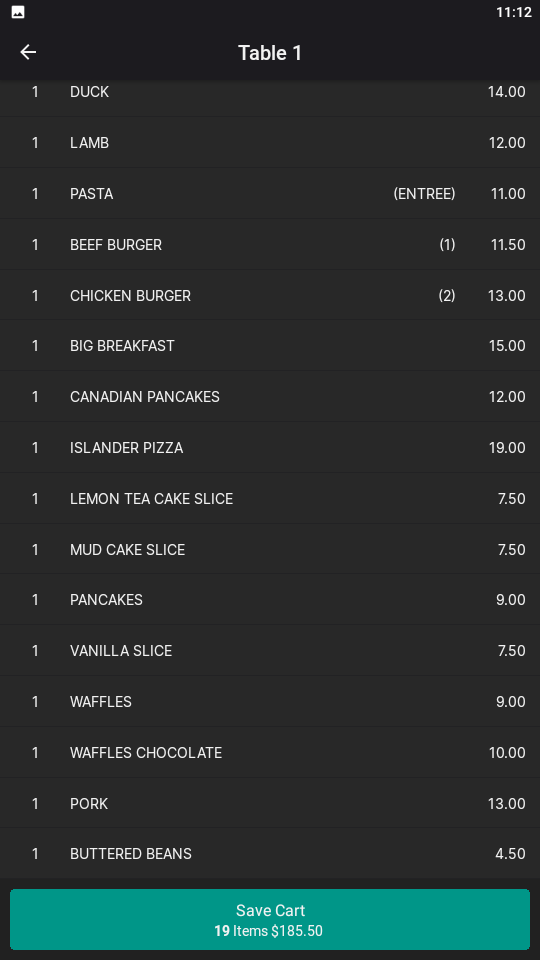
At any point in the order, the Review Cart button (located at the bottom of the screen) can be pressed to view the items that have been saved to the cart.
The Review Cart screen provides additional functionality as outlined below.
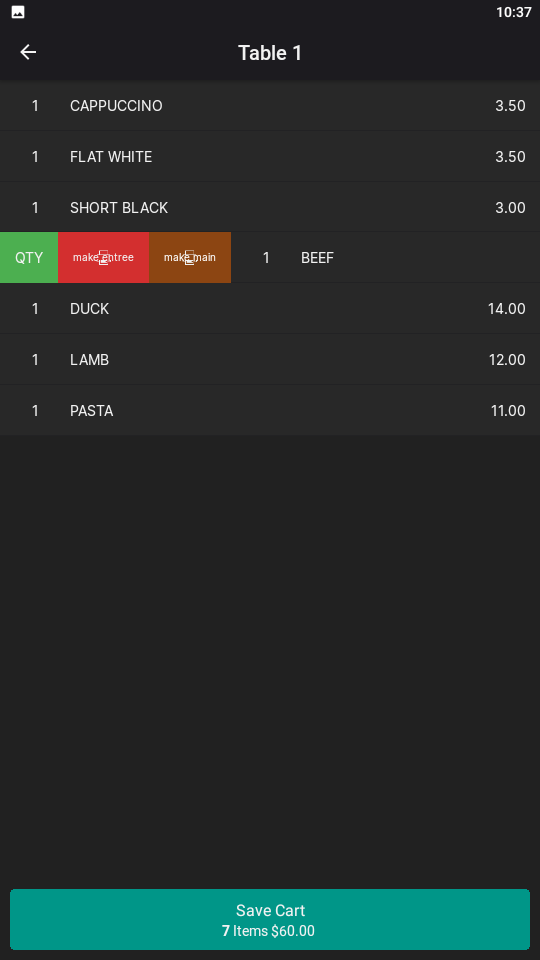
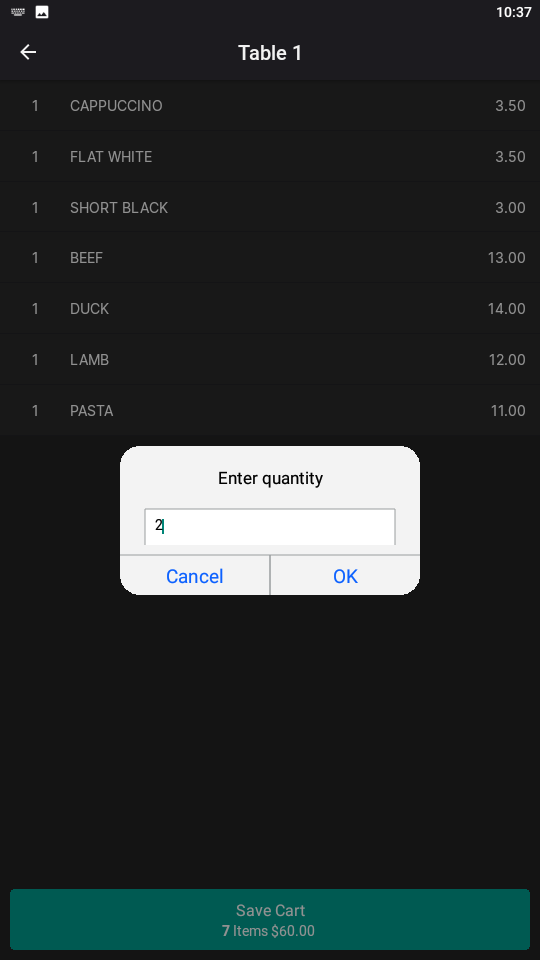
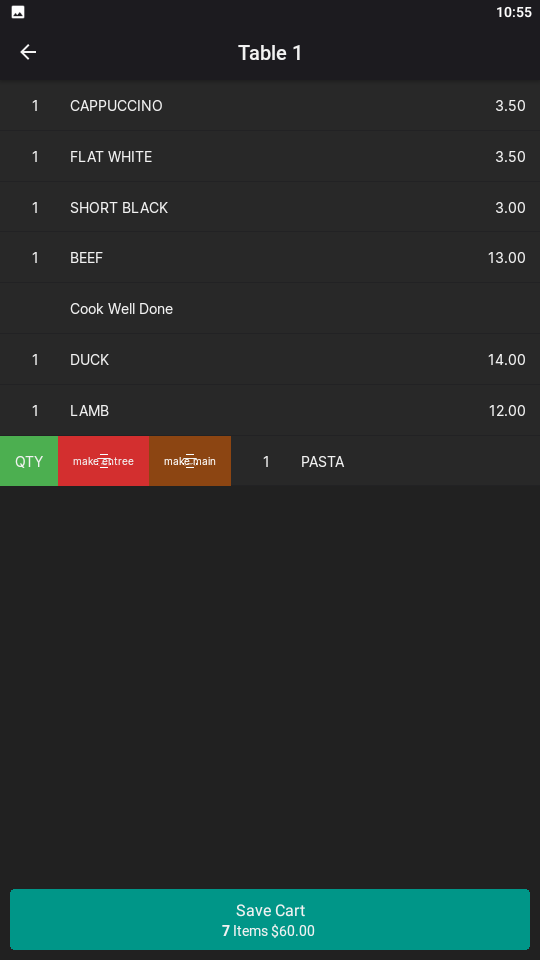
Swipe from left to right displays the following options:
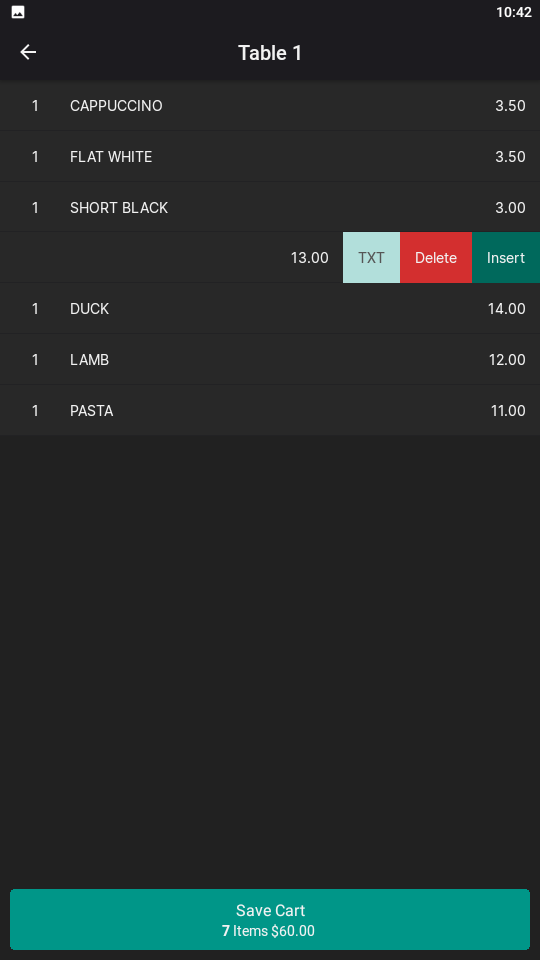
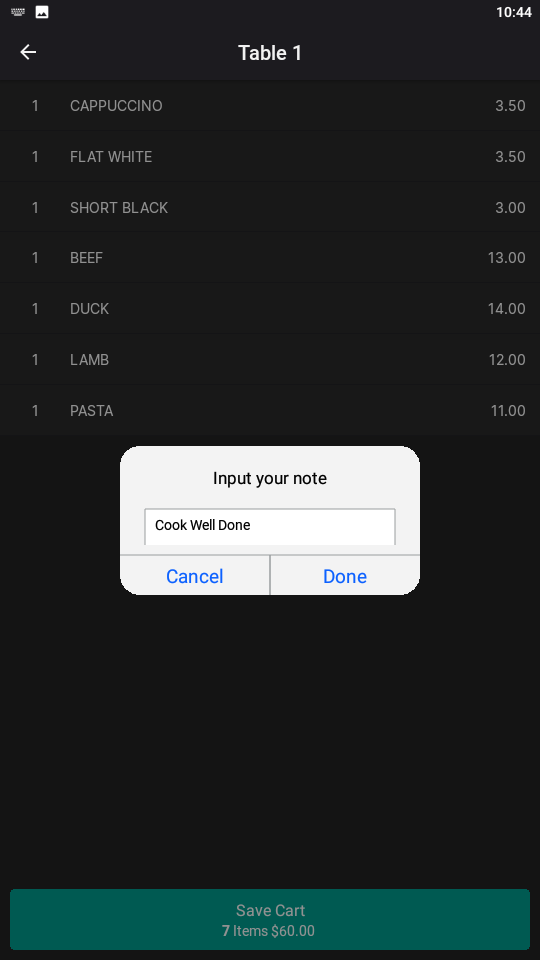
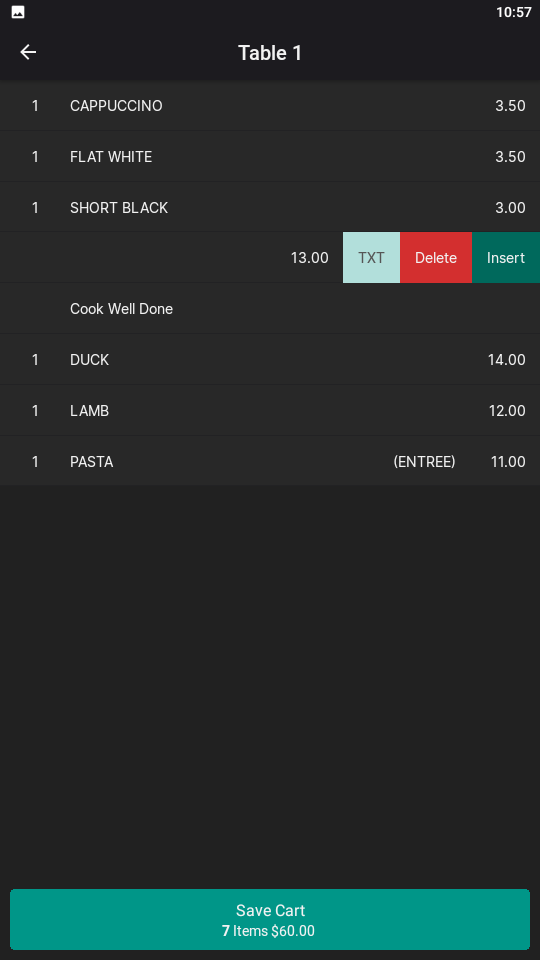
Swipe from right to left displays the following options:
The below example shows adding a TXT note to a Stock Item in an order.
Make Main/Make Entree can be used to set the Print Group Shift for an item (e.g. Guests seated at a table may want to order an entree as their main meal, and therefore, the Make Main option can be used to change this when required).
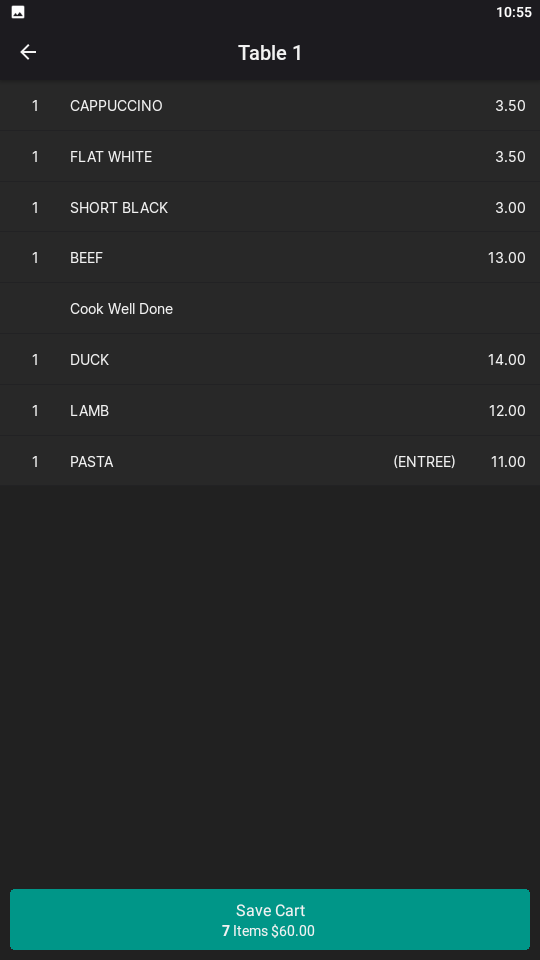
When changing a Stock Item's Print Group Shift using the Make option, the Stock Item in the list of items ordered will show the Print Group Shift in brackets next to the item ordered.
E.g. Pasta (MAIN) or Pasta (ENTREE).
Note that the Make Main/Make Entree options may not appear if this function has not been configured in Idealpos settings.
Also note that the Make Entree/Make Main options may display different Group Shifts instead of Main/Entree depending on how your Idealpos system is configured.
These options are controlled via Idealpos Back Office > Setup > Global Options > Miscellaneous > Ideal Handheld > Print Group Shift 1 and Print Group Shift 2.
If these Print Group Shift options are not configured in Idealpos, they will not appear in the menu when swiping from left to right on a Stock Item in an Order.
The below example shows Deleting a Stock Item using the Delete function.
When pressing Delete, any Notes associated with the Stock Item will also be deleted.
In addition, when adding Stock Items to an order, they can be allocated to specific Seat Numbers.
To use this function, the Seat Number must be selected prior to adding the Stock Item to the Order.
Select a Seat Number from the top of the screen, then press the Stock Item(s) to allocate to the selected Seat Number.
The currently selected Seat Number will be displayed in red at the top of the screen.
Once the Stock Items have been saved to the cart for the Seat Number, the next Seat Number can be selected, then press the Stock Item(s) to allocate to the selected Seat Number.
Repeat the process for each Seat Number at the table.
When pressing the "Review Cart" button, each Stock Item that has been allocated to a Seat Number will show the Seat Number next to it.
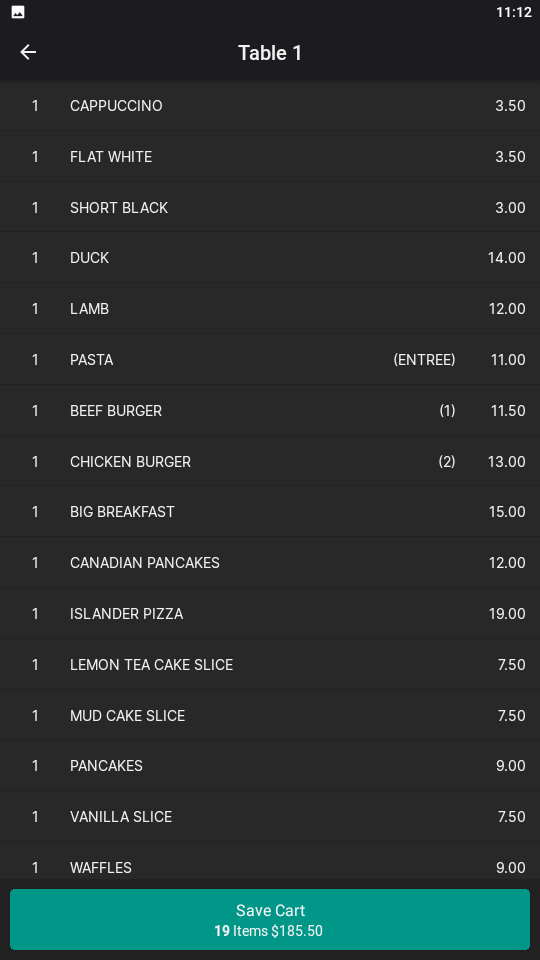
The Review Cart screen can be scrolled if there are too many items to fit on the screen at once.
Swipe up/down to scroll through the list.
If additional items need to be added to the cart, press the back arrow on the top-left corner of the device to go back to the Order Screen and select additional items.
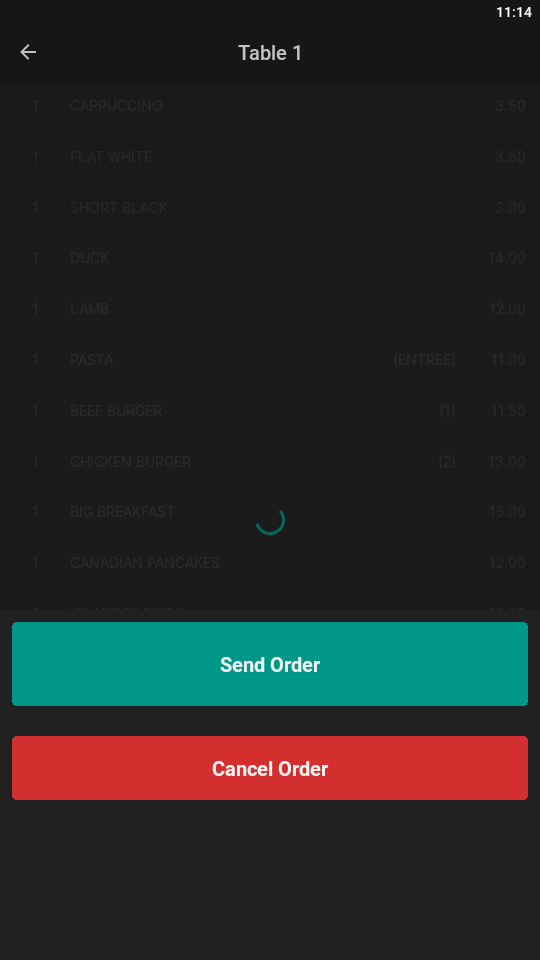
Once the required Stock Items have been added to the cart, press the "Review Cart" button at the bottom of the screen, then press the "Save Cart" button.
The following options will be displayed:
If the above Send Order/Cancel Order prompt has been triggered and additional items are still required, press in the blank area above the prompt, then press the back arrow on the top-left corner to return and add additional items to the cart (doing this is similar to the "Do Later" button that appeared in previous versions of Pocket Pad/Handheld).
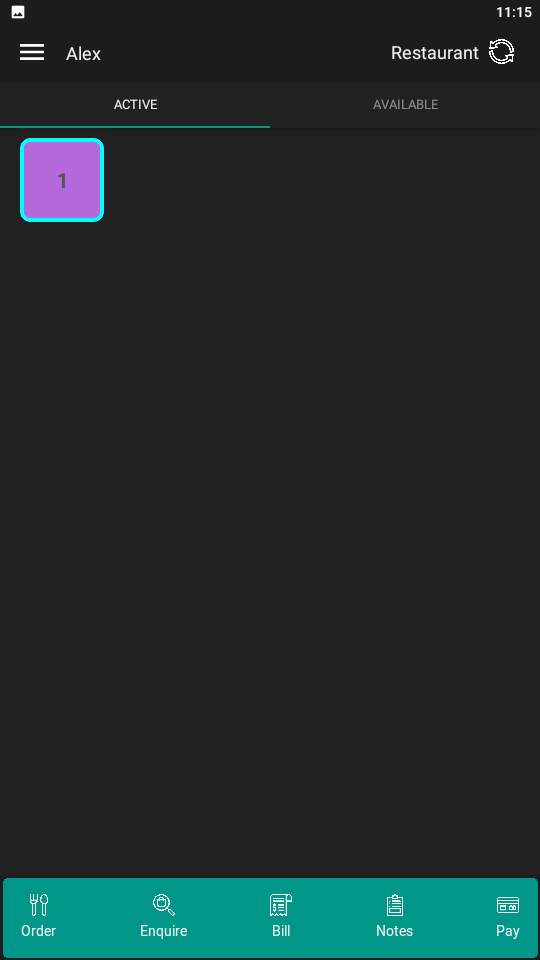
After pressing the Send Order button, the Table will appear in the Active tab, the status will be updated to Ordered and the colour of the table will change to indicate that items have been saved to it.
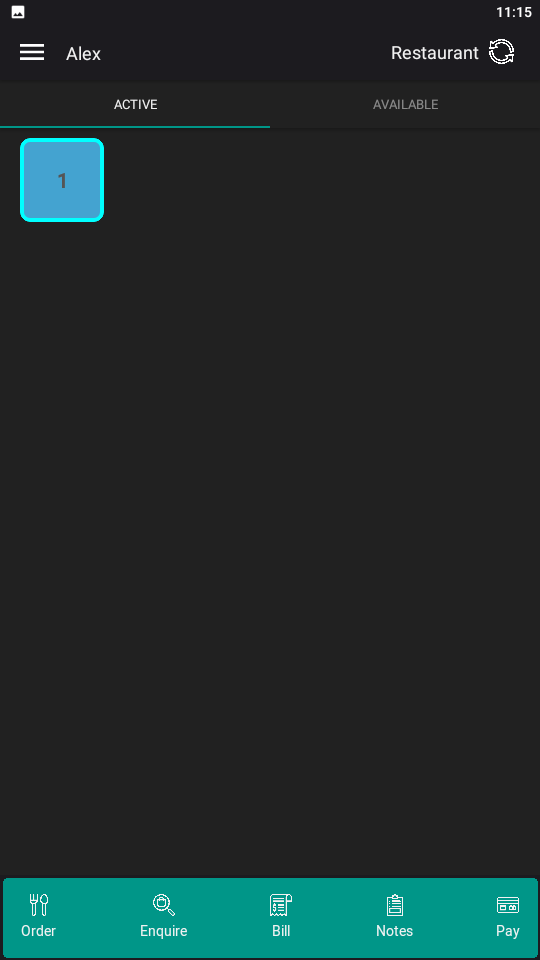
If a Bill is required for the Table, the "Bill" button can be pressed at any time.
Select the Table and press the "Bill" button.
Once a Bill has been printed, the Table Status will change to Bill Printed and the table colour will also change to reflect this.
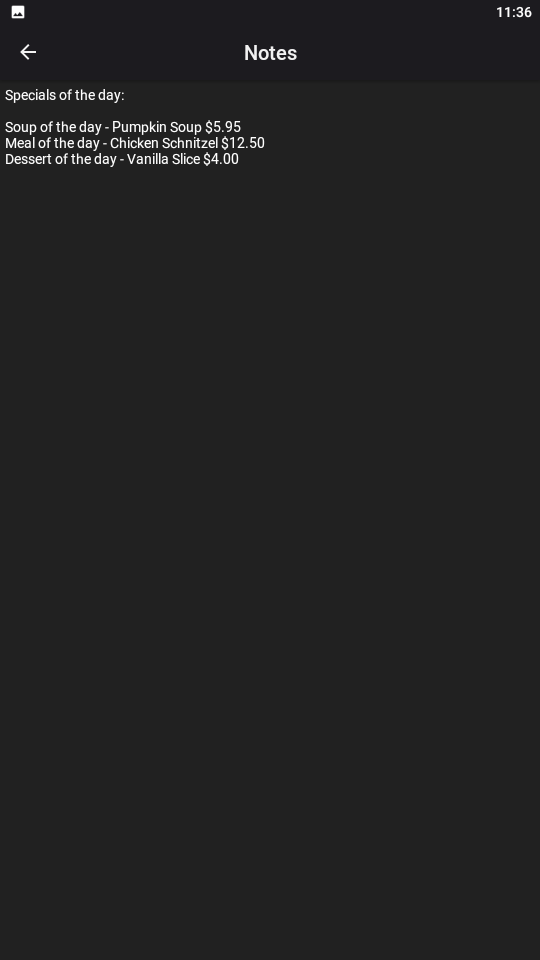
The Notes button can also be pressed to display any daily Specials/Instructions/etc.
These notes can be updated via Idealpos Back Office (Go to: Setup > Global Options > Miscellaneous > Notes).
Ensure that any table is selected, then press the "Notes" button at the bottom of the screen.
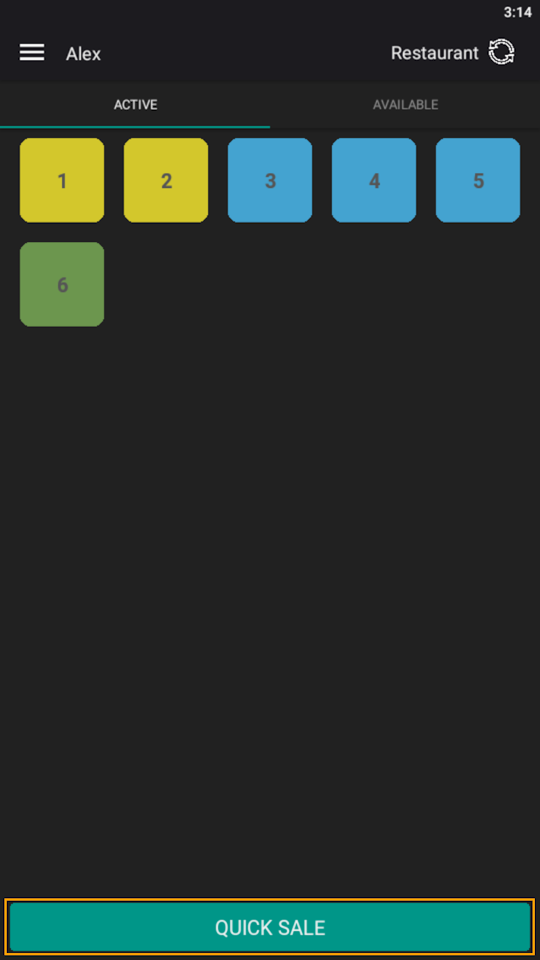
The Quick Sale button is only available when the following conditions have been met:
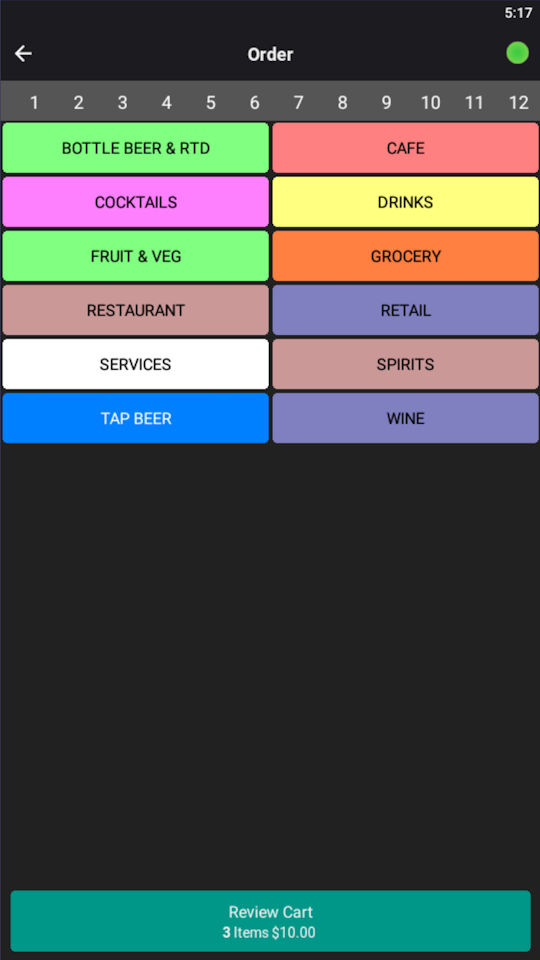
Press the Quick Sale button at the bottom of the Table Grid to access Quick Sale.
After selecting Quick Sale, the top of the app will show "Order" (instead of "Table No #" which appears when placing an order to a table).
This is an indication that a Quick Sale is being performed.
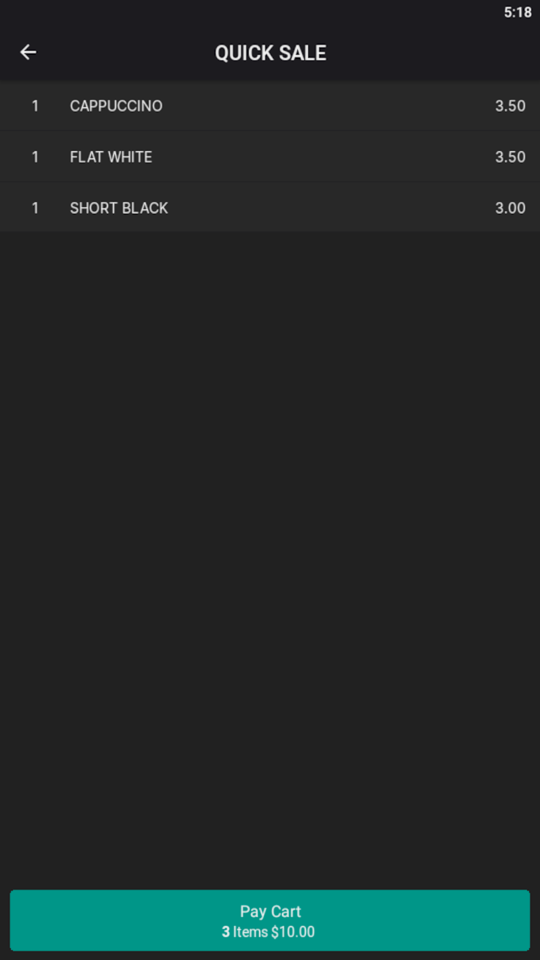
Add items to the Quick Sale in the same way as placing an order to a table, then press the "Review Cart" button at the bottom of the screen.
The app will show "Quick Sale" along with the items that are currently in the Quick Sale.
Any adjustments can be made to the items such as changing the quantity or adding text notes.
E.g. Swipe from left to right to access the QTY option.
Swipe from right to left to access the TXT, Delete, Insert options).
To continue, press the "Pay Cart" button at the bottom of the screen.
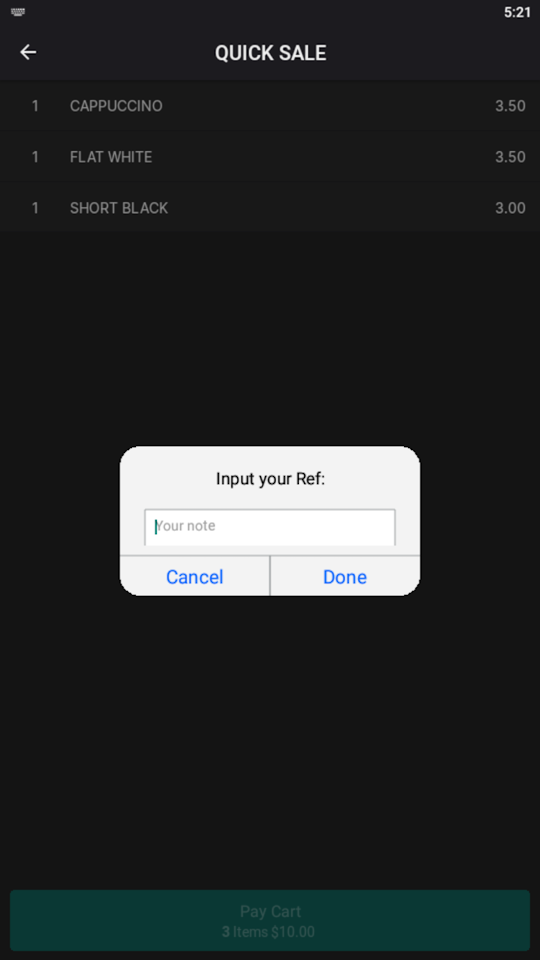
If the Prompt for Ref option is enabled in the app, a Reference prompt will be displayed.
In this prompt, any reference for the Quick Sale can be entered, such as a Customer Name or other reference.
The entered reference will print to the Kitchen Docket Printer(s) after the Quick Sale has been paid.
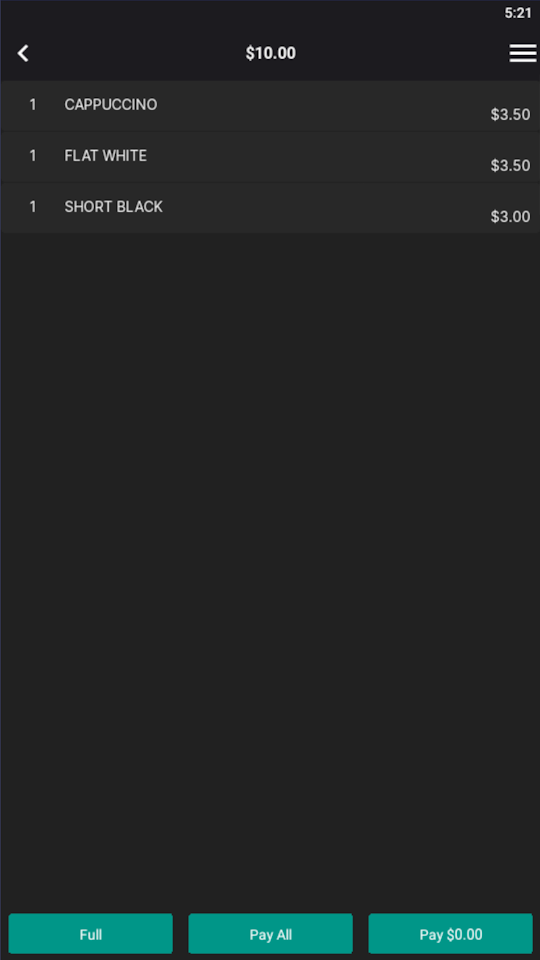
The app will then display the Payment Screen where the items in the Quick Sale will appear.
Items can be all paid at once, or they can be individually paid off using the split tender functionality.
The Payment Screen is the same regardless of whether using Quick Sale or Table Payment.
Refer to the Processing Payments for Quick Sale or Table Sale section below for more details.
When Quick Sale Only Mode is enabled, the app will be locked to only placing Quick Sales and access to the Table Grid will be disabled.
This means that the device will be unable to save items to tables or place table orders.
Quick Sale Only Mode can be enabled by going to App Settings > Enter Password > Payment Integration > Quick Sale Only Mode.
When the app is started, it will Download Program Data and immediately display the Quick Sale Mode.
The back button will not appear when viewing the main POS Screen Menu, thereby restricting the app to this mode.
Items can be ordered in the same way as outlined above in the Performing a Quick Sale using Quick Sale button section.
After the Quick Sale order is placed and paid, the device will return to the Quick Sale, ready for taking the next Quick Sale order.
To pay a table, select the Table from the Table Grid and press the "Pay" button at the bottom of the screen.
The Pay button will only appear when the Pocket Pad Payments module is enabled in the Licence Gateway and the app has been configured for the Payment functionality.
Refer to the Configuring Pocket Pad v2 page for further information.
After selecting a table and pressing the "Pay" button at the bottom of the screen, the app will display the Payment Screen.
Information about using the Payment Screen is outlined below in the Processing Payments for Quick Sale or Table section.
If using Quick Sale, the Payment Screen will appear after pressing the Pay Cart button.
If paying a Table, the Payment Screen will appear after selecting a Table on the Table Grid and pressing the "Pay" button.
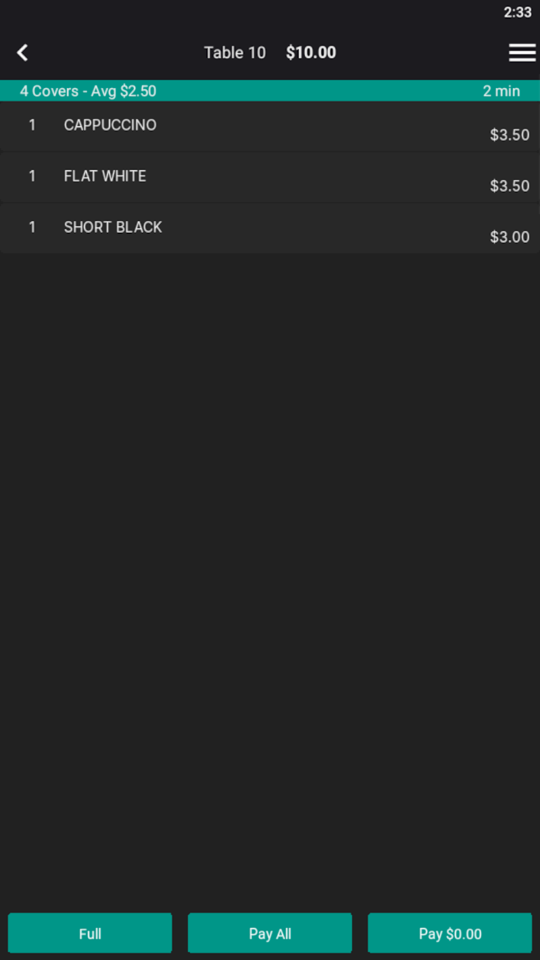
The screen contains the following buttons that appear at the bottom of the screen:
If Paying a Quick Sale, the Covers information will not appear (i.e. Number of Covers/Average amount per cover and the time the table has been active).
The example shown below left shows the Payment Screen when paying off a Quick Sale.
The example shown below right shows the Payment Screen when paying off a Table.
Tips!
Promotions
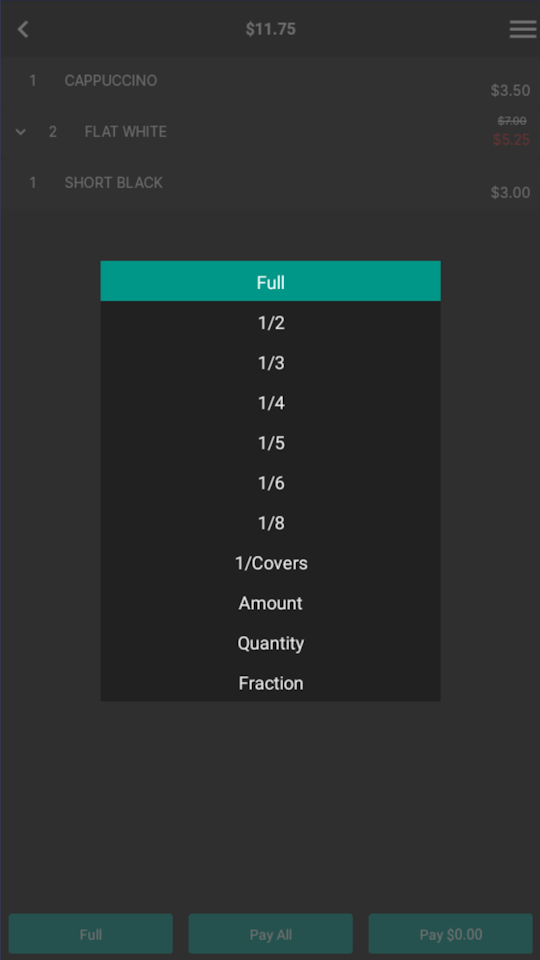
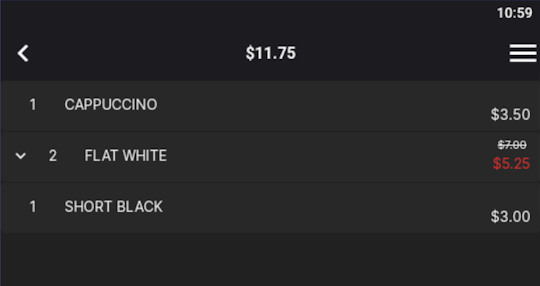
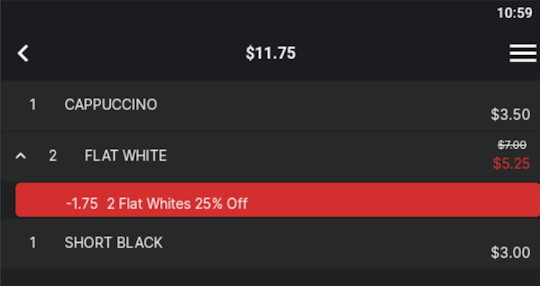
If there are any promotions that were triggered in the Quick Sale, the item which includes a promotion will show the discounted price in red.
The promotion details can be displayed by pressing on the item, as shown in the example below.
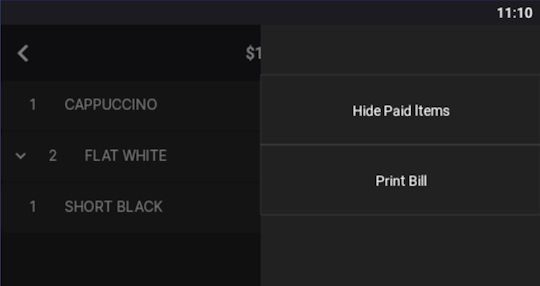
Hide Paid Items/Print Bill
The Hide Paid Items and Print Bill functions are available from the menu option (three horizontal lines) on the top-right corner of the screen.
Pressing the "Full" button on the bottom-left corner of the Payment screen will display a list of Fractions that can be used to pay a portion of the sale.
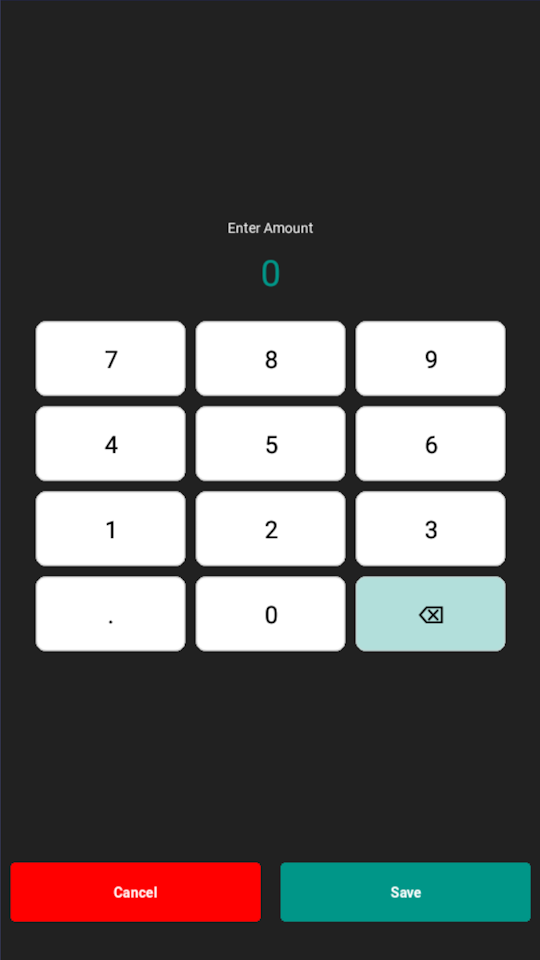
If the Amount, Quantity or Fraction options are used, a prompt will appear to enter the Amount/Quantity/Fraction as shown in the example below.
Details about using each type of payment portion option are listed below:
After the items have been selected and the Pay All or Pay $X.XX button are pressed, the app will proceed to the next step to take payment.
After the steps below have been completed to take payment, if there are still outstanding items that need to be paid on the table, the device will return to the payment screen to continue taking payments until all items have been paid.
Note!
When taking payments for a table, it is not necessary to process all payments at once.
E.g. If one guest wants to pay their share while the other guests want to remain seated to pay later, the payment from the leaving guest can be processed, then when the app returns to the payment screen showing the remaining items that still need payment, simply press the back button on the top-left corner to return to the Table Grid.
The next step may vary depending on how the app is configured.
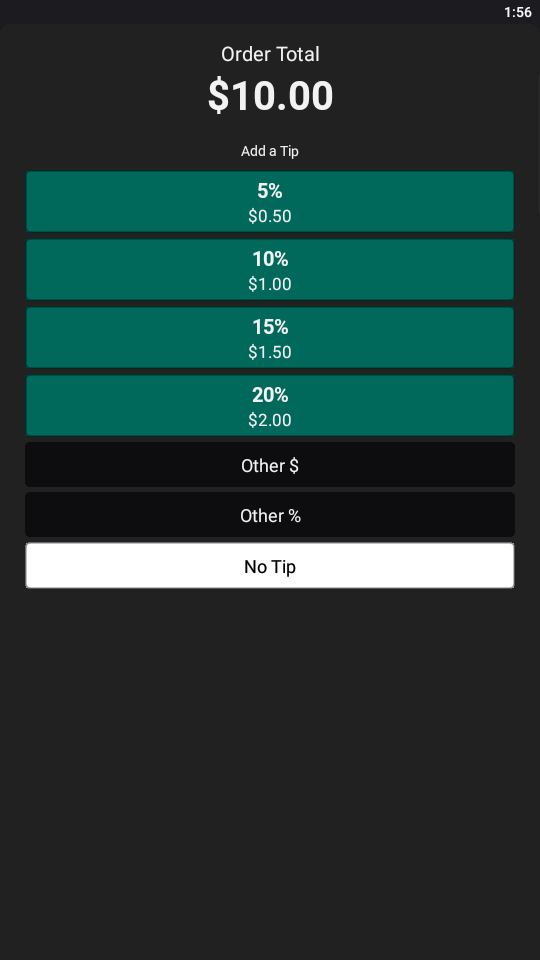
If Tipping is enabled, the "Add a Tip" prompt will be displayed using the percentage amounts that have been configured in the app.
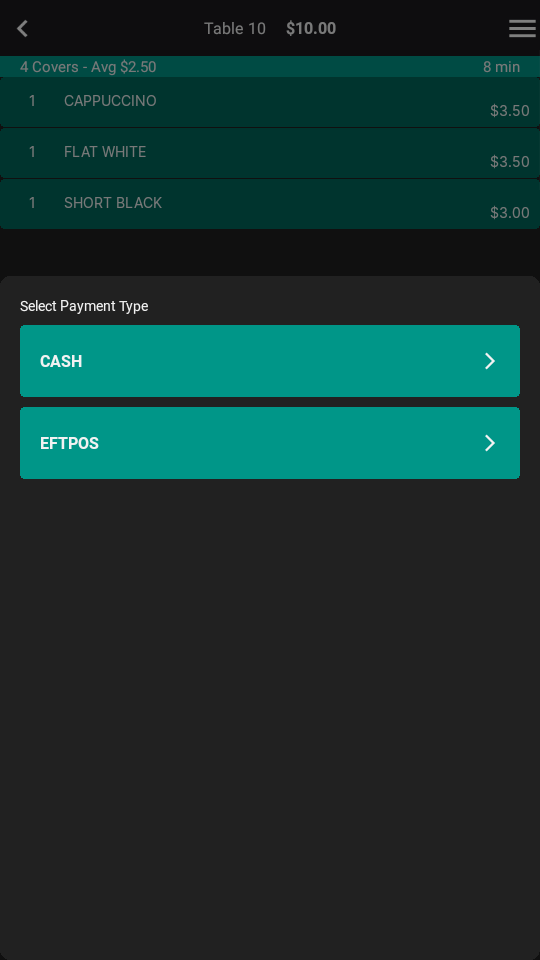
If Cash Tender and EFTPOS are both enabled, the app will then prompt to select a Payment Type (CASH or EFTPOS).
Note!
The Payment Type descriptions may vary depending on how the Tender has been configured in Idealpos as well as the Tender that has been mapped to the CASH and EFTPOS functions in the Pocket Pad app.
Cash Tender enabled
If Cash tender is enabled, the following prompt will be displayed:
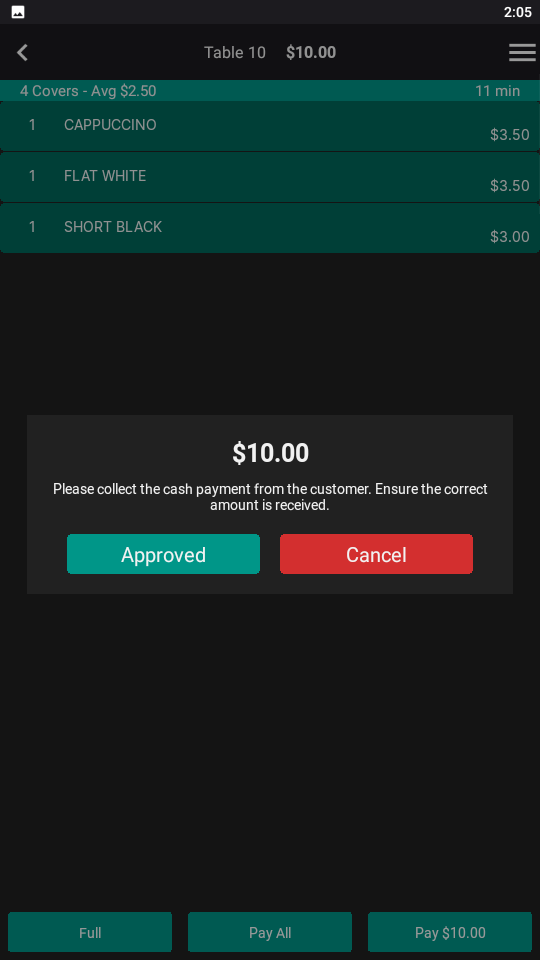
Selecting CASH will trigger the following prompt to be displayed.
Select Approved after the customer has given the amount displayed or press Cancel to cancel the payment and return to the payment screen.
Note!
The app only supports receiving the CASH payment in the exact amount that is due.
It is possible to accept a cash amount greater than the amount due, then manually calculate the change to give to the customer, however, this will not be recorded or included in Idealpos Reports.:
If there are still outstanding items that need payment after the payment has been processed, the app will return to the payment screen so that the remaining items can be paid.
Selecting EFTPOS will take payment from the customer using the EFTPOS functionality (refer to the below "Cash Tender Disabled" for additional details about taking EFTPOS Payment).
Cash Tender disabled
If Cash tender is disabled, the app will skip the Select Payment Type prompt and will go straight to the EFTPOS prompts to take payment from the customer.
This process will vary based on the EFTPOS Payment Type that has been configured in the app and whether the Oolio Tipping functions have been enabled for the EFTPOS integration in the app configuration.
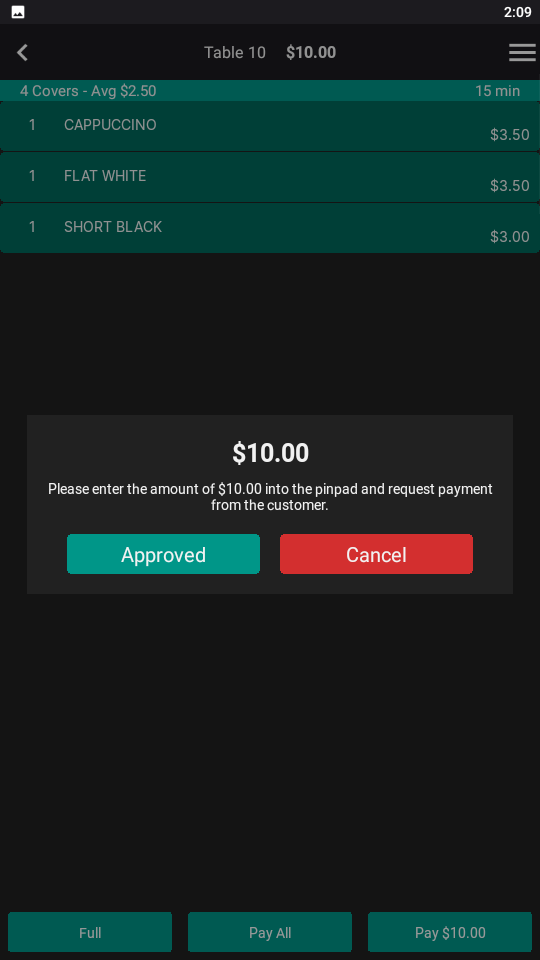
If using Manual EFTPOS, the following prompt will be displayed.
Enter the amount shown on an EFTPOS pinpad and after the payment has been approved on the pinpad, select the Approved button.
If the payment is declined or cancelled, press the Cancel button.
If there are still outstanding items that need payment after the payment has been processed, the app will return to the payment screen so that the remaining items can be paid.
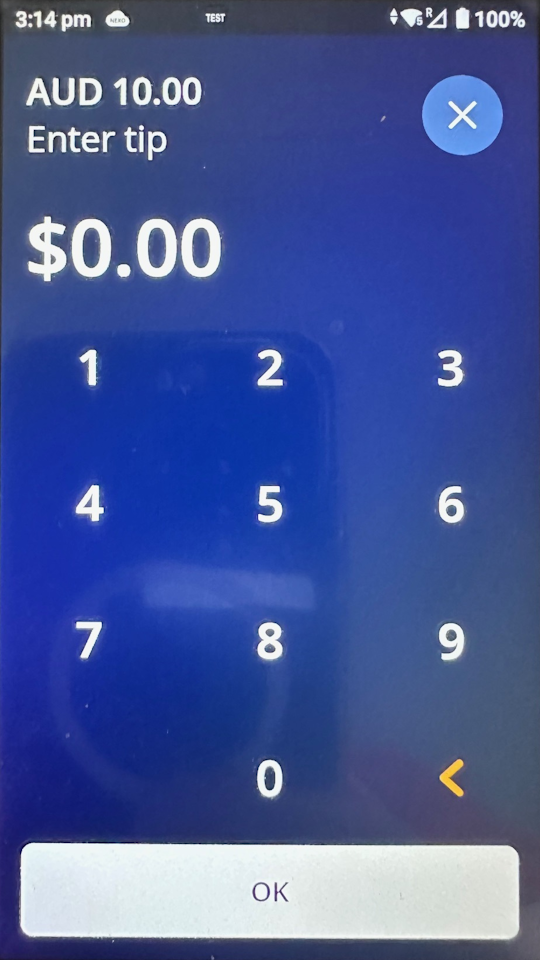
If using Oolio Pay Global and Oolio Tipping is enabled, the "Enter tip" prompt will be displayed:
Enter a tip amount if the customer wants to place a tip.
If using Oolio Pay Global and Oolio Tipping is disabled, the "Enter tip" prompt will be skipped.
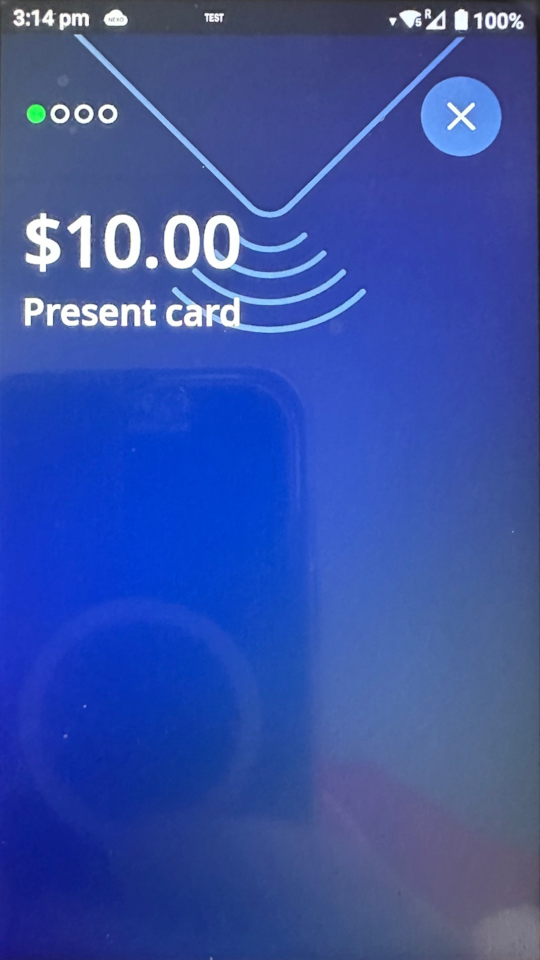
The device will prompt to Present card.
The card can be inserted into the device or tapped on the card reader.
Follow the remaining prompts to process the payment.
If there are still outstanding items that need payment after the payment has been processed, the app will return to the payment screen so that the remaining items can be paid.
This mode restricts the app to only accessing the Payment functions in the app.
Access to the "Order" and "Quick Sale" buttons will be disabled when this mode is enabled.
To enable Pay@Table Only Mode, go to the app Settings > Payment Integration > Enable Pay @ Table Only Mode.
When Pay @ Table Only Mode is enabled, the Order and Quick Sales buttons are hidden/disabled.
Only the Enquire, Bill, Notes and Pay functions are available in this mode.
Select a table from the Table Grid to access these buttons at the bottom of the screen:
To take payment for a table, select the table and press the "Pay" button.
Then follow the steps outlined within the Processing Payments for Quick Sale or Table section.
Pocket Pad offers various additional options that can be used to enhance and assist with the ordering process at a table.
Click on one of the below options for details about setting up and using each function:
This option will show a Home Screen where the Clerk can enter either their Clerk Code or Login Code to login to the app.
This option can offer multiple benefits such as increased security (the operator needs to enter their Clerk ID instead of simply selecting their name from a list) as well as speeding up the Clerk logon process at sites which have a long list of available Clerks to choose from.
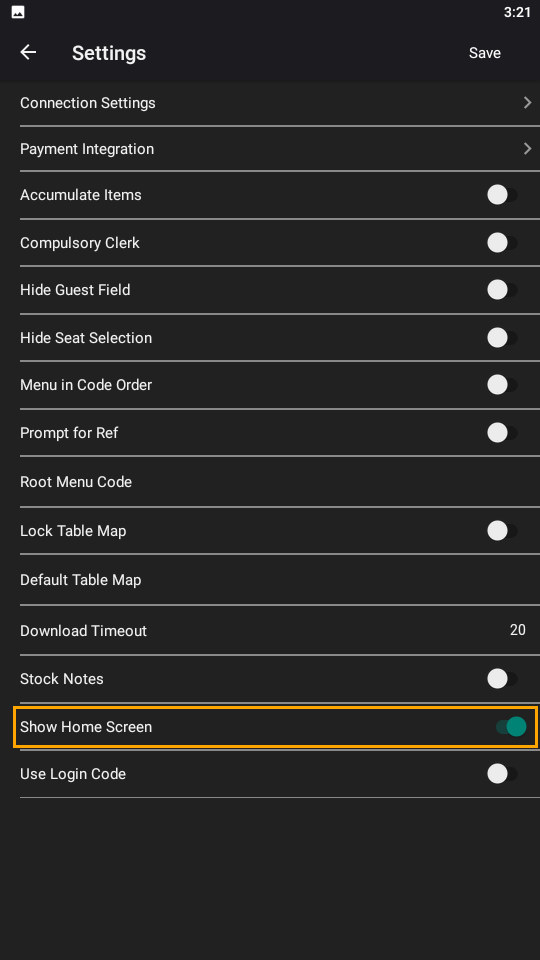
To enable this option, open the App Settings > Enter Password > Enable the "Show Home Screen" option then press "Save".
After pressing "Save", the app will Download Program Data and will then display the Home Screen.
You also have the option to enable Compulsory Clerk with the Home Screen.
When Compulsory Clerk and Show Home Screen are both enabled, the app will return to the Home Screen after each order is sent.
This can be used to further enhance security by forcing the Clerk to enter their Clerk Code/Login Code and prevent orders from being sent by unauthorised Users/Clerks.
The Pocket Pad Home Screen supports logging in with either the Clerk Code or the Login Code.
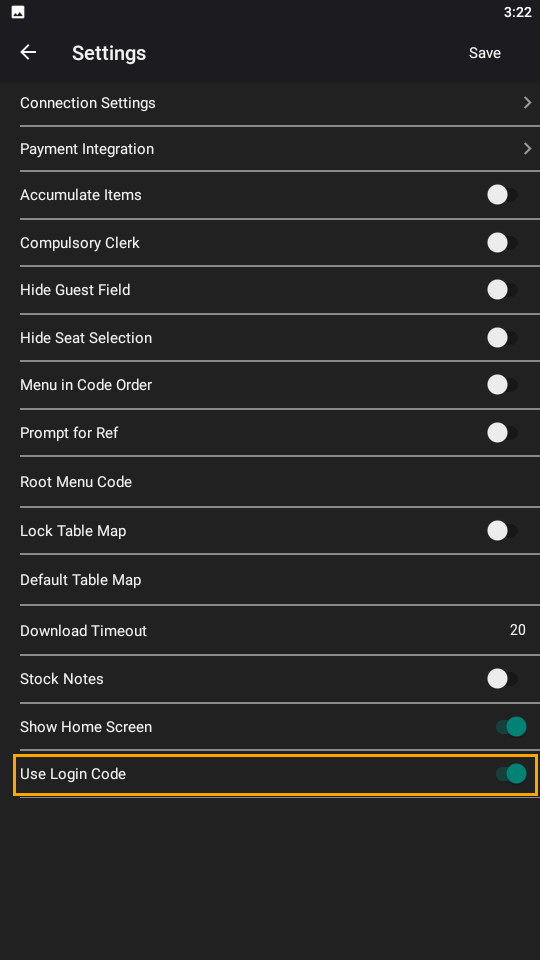
Controlling which type of code is used to login is configured via the "Use Login Code" setting in the app settings.
When "Use Login Code" is disabled, the Clerk will need to login using the Clerk Code or if "Use Login Code" is enabled, the Clerk will need to login using their Login Code.
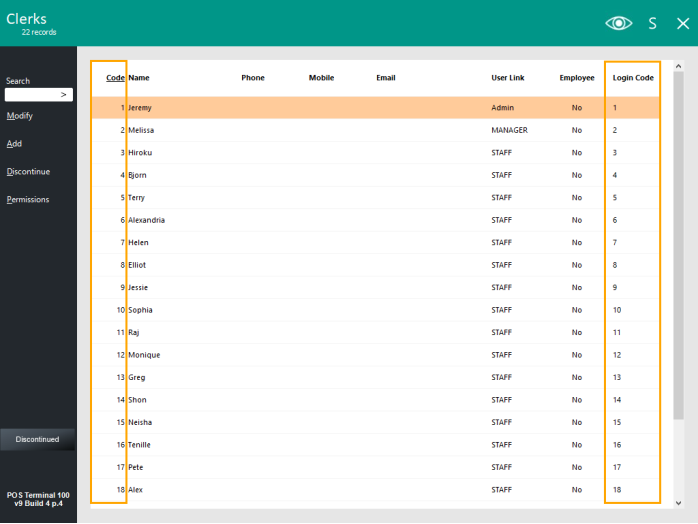
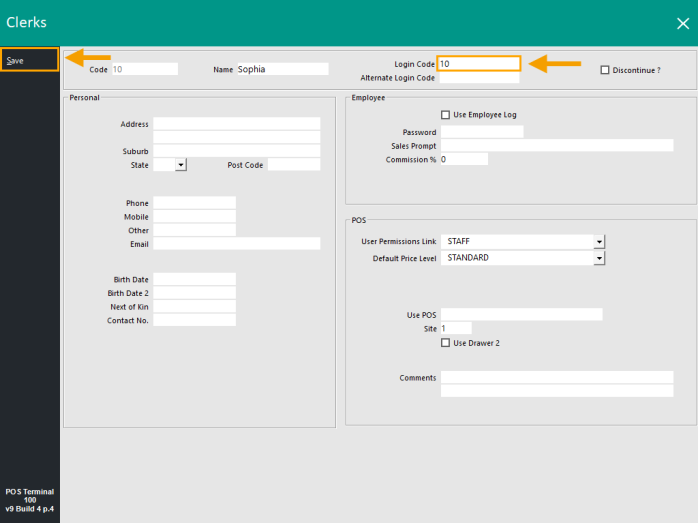
Clerks are configured in Idealpos Back Office > Setup > Clerks.
The Clerk Code is displayed in the Code column and the Login Code is displayed in the Login Code column.
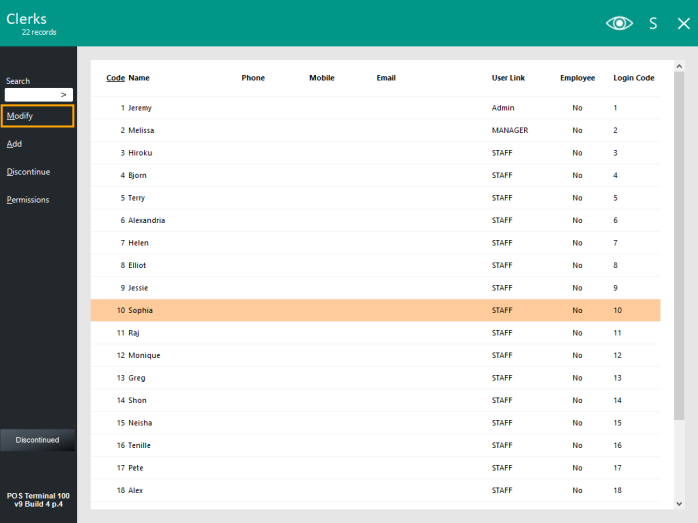
If required, a Login Code can be modified by selecting a Clerk from the list and pressing the "Modify" button.
Any modifications to Login Codes will require a Download Program Data on the device (in Pocket Pad, select the menu icon on the top-left corner > Download Program Data).
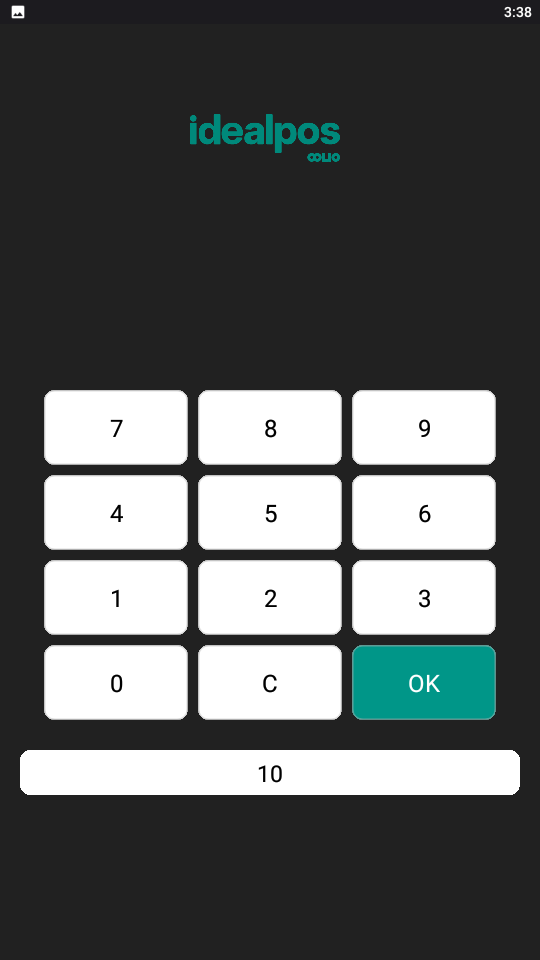
If Use Login Code is enabled, login by entering the Login Code.
Otherwise, login by entering the Clerk Code.
Press OK to login:
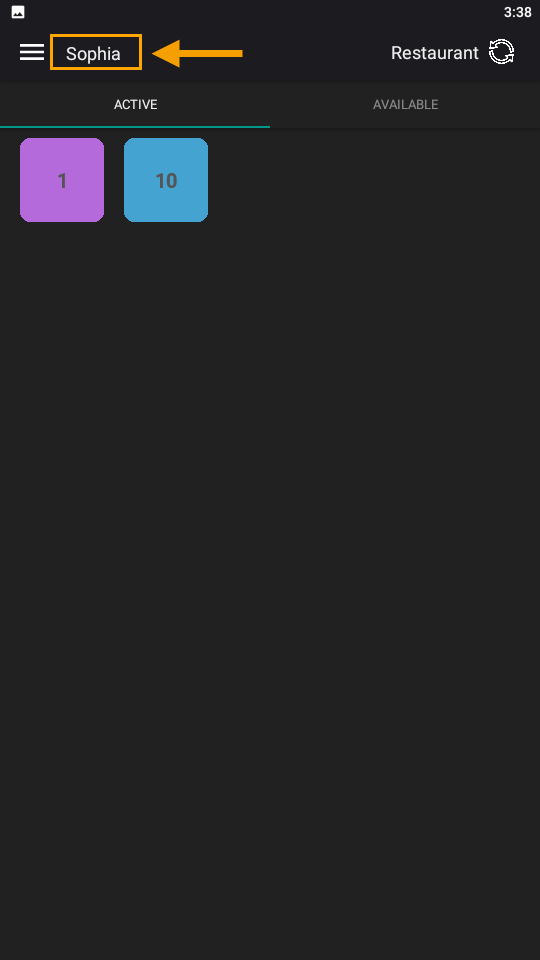
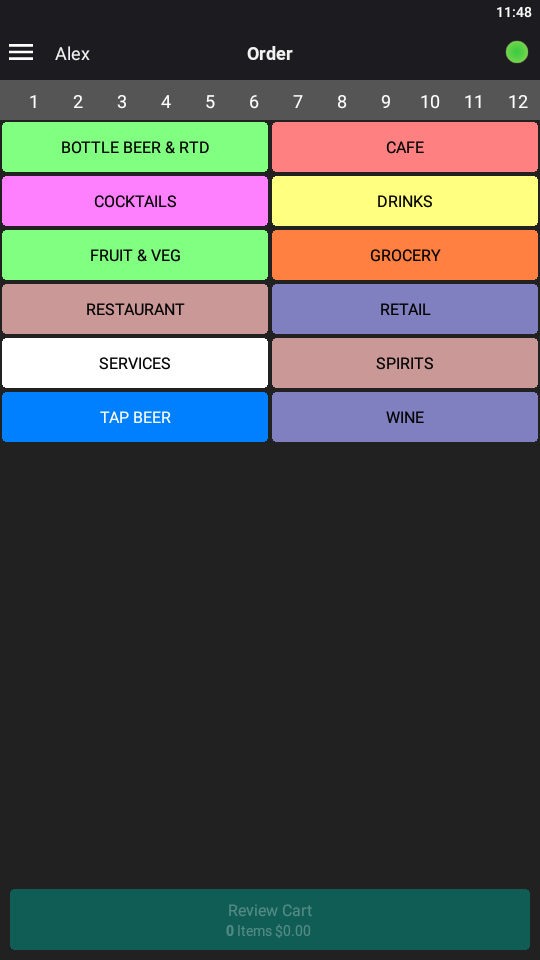
After logging in, the Clerk Name is displayed at the top-left corner of the app as per the below example:
This option makes it possible to view the Stock Notes of individual items from the app.
This feature may be beneficial for restaurants which cater for customers who have specific food requirements or allergies.
Each Stock Item in Idealpos can have Stock Notes entered which can contain information such as preparation instructions, ingredients, etc.
These details can be viewed by the Clerk from the app.
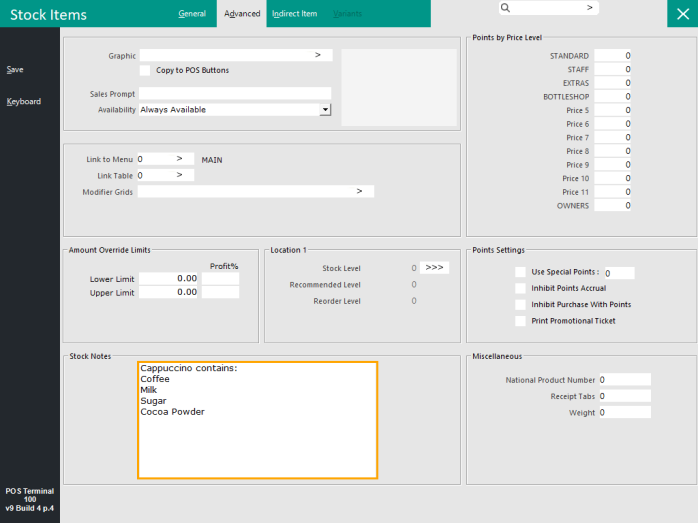
Stock Notes are entered in the Stock Notes field of Stock Items.
To enter or update Stock Notes, go to: Idealpos Back Office > File > Stock Control > Stock Items.
Select a Stock Item from the list > Modify > Advanced > Stock Notes.
Enter or update Stock Notes as required, then press "Save" to Save the changes.
Once Stock Notes have been entered/updated for the Stock Items that require notes, Pocket Pad will need to be configured to support this feature.
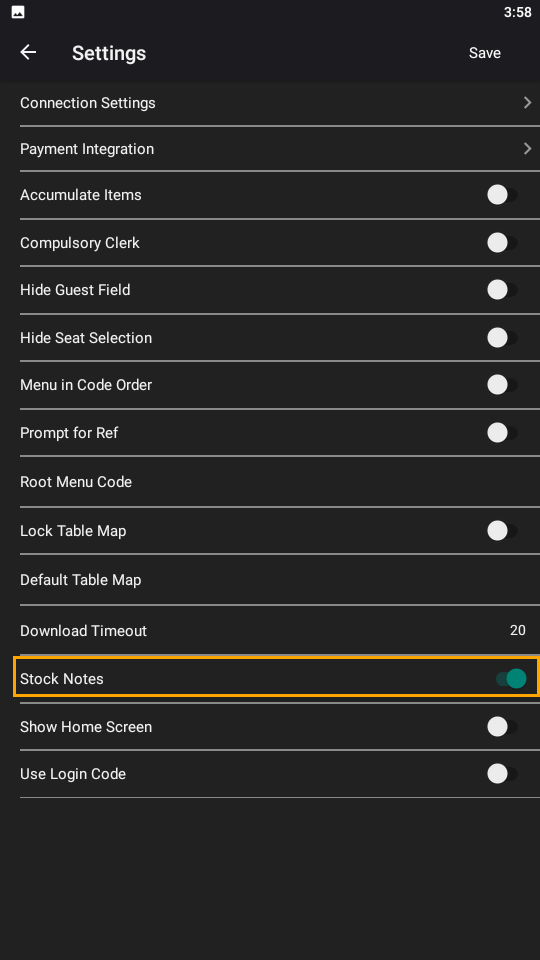
In Pocket Pad, go to the menu on the top-left corner > Settings > Enter Password > Enable the "Stock Notes" option and press "Save".
After pressing "Save", the app will Download Program Data.
After the data has downloaded, select a table from the Table Grid and press "Order".
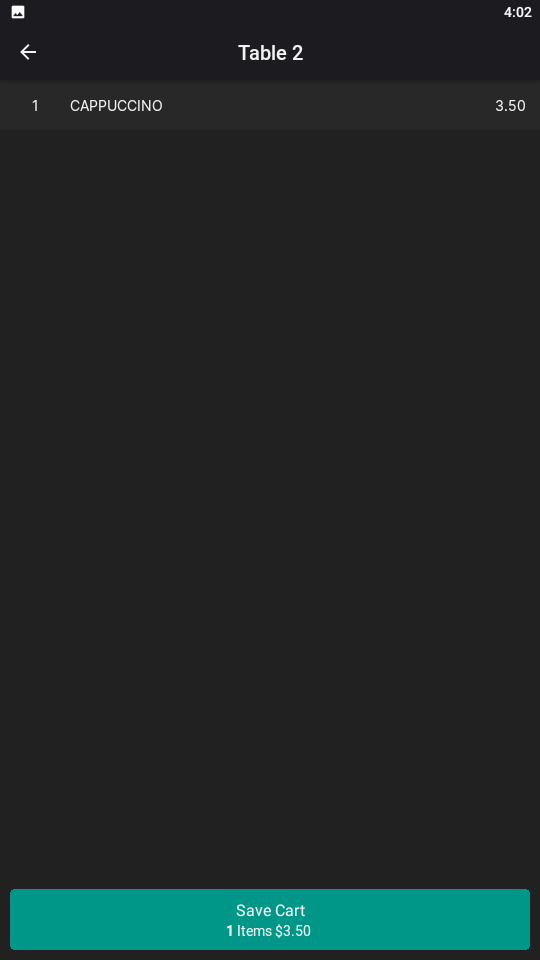
Add a Stock Item to the Cart, then press the "Review Cart" button.
Long-press on the item for approximately 5 seconds.
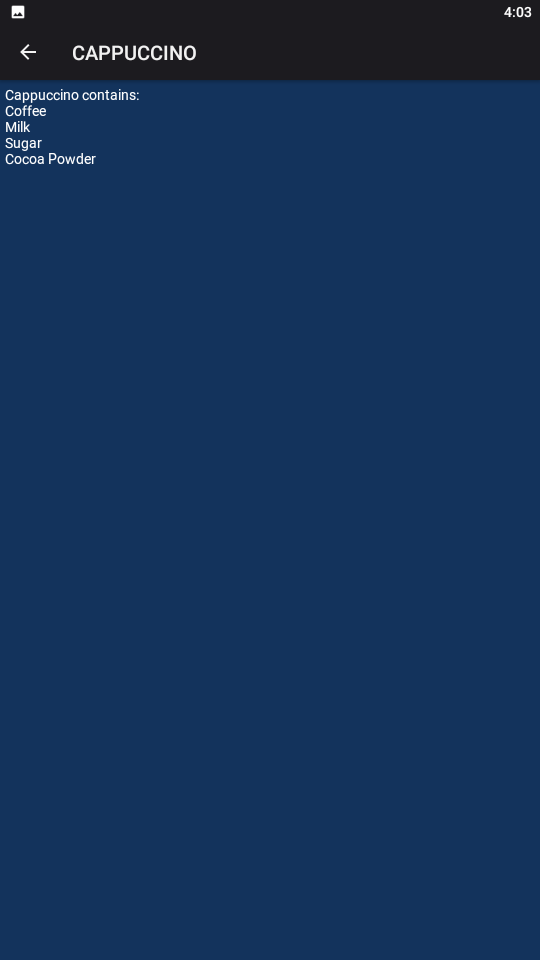
The Stock Notes for the Stock Item will appear.
If the Stock Notes exceed the screen size, they can be scrolled by swiping up/down.
Once the Stock Notes have been reviewed, press the "Close" button to return to the order screen.